
Are you tired of dealing with messy cement, heavy mixing, and permanent installations that crack during winter? Learning how to install mailbox post without concrete is a smart move for many US homeowners. Traditional concrete mixes can be frustrating, prone to frost heave in colder climates, and nearly impossible to remove if you ever want to change your landscaping. Fortunately, modern hardware offers fantastic alternatives. Whether you want a quick weekend project or a temporary setup, skipping the cement saves time. This guide covers practical, code-aware methods to secure your post. We detail the best tools, USPS rules, and step-by-step instructions to ensure your mail arrives safely without the hassle of mixing cement.
Quick Answer
The best way to install a mailbox post without concrete depends on your soil and climate. Top options include driving a heavy-duty ground anchor or mailbox post spike directly into the earth, setting a buried post sleeve, attaching a surface-mount base to an existing driveway, or mounting the post to a wall. These methods offer excellent stability, avoid frost heave, and allow for easy removal or replacement when needed.
Why Install a Mailbox Post Without Concrete?
There are several compelling reasons to choose a no-concrete mailbox post. First, it is much faster. You skip the tedious process of mixing cement and waiting days for it to cure. Second, it creates significantly less mess in your yard.
Concrete is also permanent. If you make a mistake or want to update your curb appeal later, removing a cemented post means breaking up heavy chunks of rock. A removable mailbox post gives you the flexibility to change your mind.
Furthermore, skipping cement helps prevent frost heave. In freezing climates, water gets trapped in concrete bases, expands when frozen, and pushes the post out of alignment. A flexible installation moves naturally with the soil, maintaining better mailbox post stability over time.
Before You Start: Check USPS Mailbox Rules and Local Codes
Before starting your DIY mailbox installation, you must verify local rules. The United States Postal Service (USPS) has specific USPS mailbox guidelines to ensure mail carriers can safely deliver your letters.
Always check your local mailbox height requirements. Generally, the bottom of the mailbox should be roughly 41 to 45 inches from the road surface. You also need to confirm the correct mailbox setback from curb. Most post offices require the mailbox to be set back 6 to 8 inches from the front face of the curb or road edge.
Do not treat these numbers as universal legal requirements, as local postmasters can have unique rules. Call your local post office to confirm exact measurements. Additionally, check with your Homeowners Association (HOA) or municipal codes for neighborhood-specific aesthetic restrictions.
Tools and Materials You’ll Need
Gathering the right gear makes mailbox post installation smooth and safe. Here is a standard list of tools for most no-dig methods:
- Safety Gear: Work gloves, safety glasses, and boots.
- Digging Tools: Post-hole digger, manual auger, or shovel.
- Striking Tools: Sledgehammer and a rubber mallet.
- Measuring Tools: Tape measure, carpenter’s level, and string line.
- Hardware: Ground anchor, mailbox post spike, buried post anchor, or mailbox mounting plate.
- Post Material: A pressure-treated mailbox post or a durable metal mailbox post.
- Base Material: Crushed gravel or pea gravel.
- Fasteners: Galvanized screws and bolts to prevent rust.
Safety Note: Always call 811 a few days before digging anywhere in the United States to have underground utility lines marked for free.
Best Ways to Install a Mailbox Post Without Concrete
Let’s explore five proven methods to secure your post.
Method 1: Use a Ground Anchor or Mailbox Post Spike
A ground anchor mailbox post uses a heavy metal spike driven deep into the earth. A mailbox post spike is ideal for standard dirt or clay yards.
Best Conditions: Firm soil, clay, or loam. Avoid rocky soil.
Tools: Sledgehammer, level, spike anchor kit, post, screws.
Steps:
- Mark the correct location based on USPS setbacks.
- Place the pointed end of the spike on the ground.
- Drive the spike into the dirt until the base plate sits flush with the soil surface.
- Insert your wood or metal post into the spike’s receiver collar.
- Check for level and tighten the set screws securely.
Pros: Very fast, highly secure, no digging required.
Cons: Hard to install in rocky ground.
Difficulty/Time: Easy / 20 minutes.
Removable: Yes, by unscrewing and pulling the spike.
Method 2: Install a Buried Post Sleeve or Anchor Socket
This method uses a mailbox post sleeve that sits underground. A buried post anchor acts as a hidden socket, keeping the actual wood post above ground, which prevents rot.
Best Conditions: Any soil type, especially areas with high moisture.
Tools: Post-hole digger, shovel, gravel, anchor socket, tamper.
Steps:
- Dig a hole roughly 18 to 24 inches deep and wide enough for the sleeve.
- Add a few inches of gravel at the bottom for drainage.
- Drop the anchor socket into the hole.
- Backfill the hole with soil or gravel, tamping it down tightly every few inches.
- Slide your pressure-treated mailbox post into the sleeve and secure it with provided pins.
Pros: Protects wood from soil rot, very stable.
Cons: Requires digging a moderate hole.
Difficulty/Time: Moderate / 45 minutes.
Removable: Yes, the post easily slides out of the sleeve.
Method 3: Use a Surface-Mount Mailbox Post Base
If you have a concrete driveway or a sturdy brick pillar nearby, you can use a mailbox mounting plate. This requires you to install mailbox post without digging into the earth.
Best Conditions: Existing concrete pads, driveways, or retaining walls.
Tools: Hammer drill, masonry bits, concrete wedge anchors, mounting base, wrench.
Steps:
- Position the mounting plate on the concrete surface, ensuring it meets setback rules.
- Mark the bolt holes with a pencil.
- Drill holes into the concrete using a hammer drill and masonry bit.
- Place the base over the holes and drive concrete anchors through the plate.
- Tighten the nuts with a wrench, then attach your post to the base bracket.
Pros: Extremely sturdy, zero soil disturbance.
Cons: Requires a solid existing surface; drilling concrete is loud.
Difficulty/Time: Moderate / 30 minutes.
Removable: Yes, by unbolting the base from the concrete.
Method 4: Mount the Mailbox to an Existing Wall, Fence, or Deck Post
Sometimes the best support is already built. Mounting directly to a fence or deck avoids buying a full post altogether.
Best Conditions: Homes with front fences, retaining walls, or deck railings near the street.
Tools: Power drill, exterior wood screws or lag bolts, mounting bracket.
Steps:
- Verify the wall or fence is structurally sound and meets USPS clearance rules.
- Hold the heavy-duty mounting bracket against the surface at the correct height.
- Drill pilot holes to prevent the wood from splitting.
- Secure the bracket using long, exterior-grade lag bolts.
- Attach the mailbox directly to the bracket or add a short arm extension.
Pros: Saves money, very quick, utilizes existing structures.
Cons: Limited by the location of your fence or wall.
Difficulty/Time: Easy / 15 minutes.
Removable: Yes, simply unfasten the bracket.
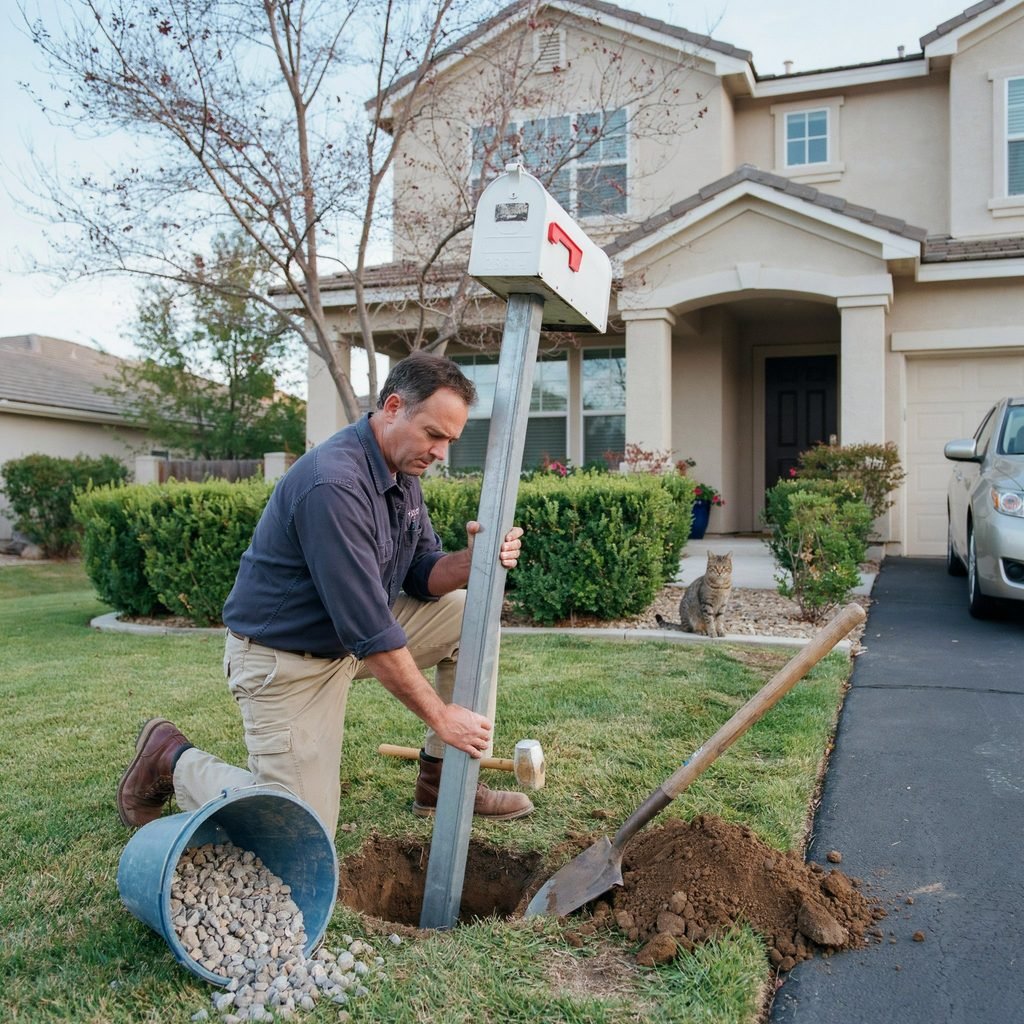
Method 5: Create a Compacted Gravel Base for a Temporary or Light-Duty Post
Using a gravel base for mailbox post setups is an old-school method. It works well when you need a quick, cheap fix or a temporary mailbox post.
Best Conditions: Well-draining soil, mild climates, light-weight mailboxes.
Tools: Shovel, crushed gravel, tamper, post, level.
Steps:
- Dig a hole about 18 inches deep and 10 inches wide.
- Place the post in the center of the hole and hold it perfectly level.
- Shovel crushed gravel into the hole in three-inch layers.
- Use a hand tamper to pack the gravel tightly around the post after each layer.
- Mound the top layer of gravel slightly to shed water away from the wood.
Pros: Inexpensive, provides excellent drainage.
Cons: Less stable over time in high winds or loose soil.
Difficulty/Time: Moderate / 40 minutes.
Removable: Yes, just dig out the gravel.
How to Make a No-Concrete Mailbox Post More Stable
Learning how to install mailbox post without concrete is only half the battle; ensuring it stays upright is the other. To maximize mailbox post stability, always compact the soil or gravel around your base thoroughly. Loose dirt will shift after the first heavy rain.
Adding a gravel base for mailbox post drainage prevents water from pooling around the bottom, which weakens the surrounding earth. If you are using a spike, choose a longer anchor that reaches deeper, denser soil layers. Avoid installing in loose, sandy soil without first mixing in some clay or using a wider anchor plate.
During installation, use a carpenter’s level to check the post from two perpendicular directions. Finally, inspect your setup after severe storms, tightening any loose hardware immediately to prevent leaning.
Common Mistakes to Avoid
Even simple mailbox post installation projects can go wrong. The most frequent error is how deep to install a mailbox post incorrectly. Installing an anchor too shallow will cause the post to lean when the ground softens.
Another major mistake is ignoring underground utilities. Always call 811 before driving spikes or digging holes to avoid striking gas or water lines. Skipping this step is dangerous and costly.
Many DIYers also use untreated pine directly in the soil, which rots quickly. Always choose a pressure-treated mailbox post or a metal mailbox post for longevity. Additionally, avoid over-tightening set screws on soft wood, which can strip the fibers. Finally, double-check your curb setback; placing the box too close risks damage from snowplows.
No-Concrete Mailbox Post Options Compared
To help you choose when you replace mailbox post setups, here is a quick comparison.
| Method | Best For | Stability | Removability | Difficulty | Estimated Cost Range |
|---|---|---|---|---|---|
| Ground Anchor / Spike | Firm soil | High | Excellent | Easy | $30 – $60 |
| Buried Post Sleeve | Wet soil | Very High | Excellent | Moderate | $40 – $80 |
| Surface-Mount Base | Driveways | Very High | Good | Moderate | $25 – $75 |
| Wall or Fence Mount | Existing structures | High | Excellent | Easy | $15 – $40 |
| Compacted Gravel Base | Temporary setups | Moderate | Good | Moderate | $10 – $30 |
Note: Costs are approximate US retail prices and do not include the cost of the mailbox itself.
FAQs About Installing a Mailbox Post Without Concrete
Can you install a mailbox post without concrete?
Yes. Many modern anchors, spikes, and sleeves provide excellent support without the mess, curing time, or frost-heave risks associated with traditional cement mixes.
What is the strongest way to install a mailbox post without concrete?
A heavy-duty surface-mount base bolted into a concrete driveway or a deep-driven metal ground anchor generally offers the highest structural stability against wind.
How deep should a no-concrete mailbox post go?
While it varies by frost line, most buried sleeves or spikes should penetrate at least 18 to 24 inches into the ground to ensure a solid grip below the topsoil.
Will a mailbox post spike work in rocky or sandy soil?
Spikes struggle in heavily rocky soil because they cannot penetrate the stones. In sandy soil, spikes may lack lateral grip unless you use a specialized wide-flange anchor.
Can I remove a mailbox post installed without concrete?
Yes, easy removal is a main benefit. You can usually unbolt the post from a sleeve, unscrew it from a surface plate, or pull a ground anchor out with a lever.
Do I need permission to install or move a mailbox?
Yes. You must follow USPS mailbox guidelines and often need to notify your local postmaster before moving or installing a new curbside mailbox.
Conclusion
Learning how to install mailbox post without concrete saves time and prevents frost damage. For most US homeowners, driving a heavy-duty ground anchor or using a buried post sleeve offers the perfect balance of strength and simplicity. Before you begin, always verify your local mailbox height requirements and setback rules with your post office to avoid delivery issues. Remember to call 811 to check for underground utilities before doing any digging or driving spikes. Gather your tools, pick the method that best suits your soil type, and enjoy a sturdy, reliable setup for years to come.