
Seeing a spark when you flip a switch is never a good feeling. For U.S. homeowners attempting a DIY home lighting upgrade, seeing sparks during light fixture installation is a major warning sign. It is not a normal part of the process. Sparks indicate accidental arcing, a short circuit, or a severe shock hazard. A safe ceiling light installation requires careful preparation, proper power isolation, and secure connections.
Before you even touch a wire, you must shut off the power at the circuit breaker and verify it is truly off. According to safety guidance, you should always turn off the circuit and test for residual current to ensure the wires are dead before starting any electrical work [tcpi]. If you are planning a home lighting upgrade and want to know how to install a light fixture safely, this guide will walk you through preventing electrical arcing and completing the job without scary surprises.
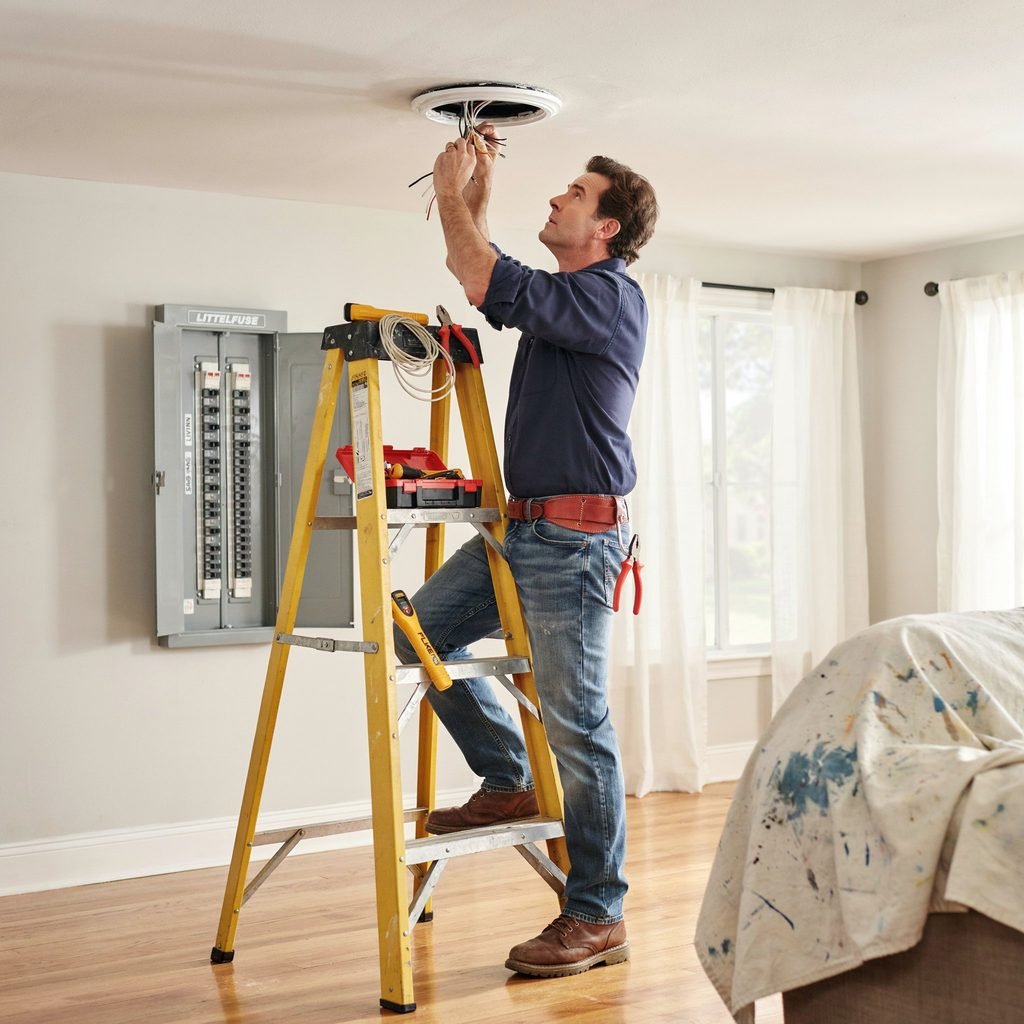
What Causes Sparks During Light Fixture Installation?
Sparks occur when electricity jumps across a gap or meets unexpected resistance. During a DIY light fixture replacement, several issues can trigger this dangerous phenomenon:
- Working on a live circuit: This is the most common cause. If the breaker is still on, touching exposed wires will cause immediate, dangerous arcing.
- Loose wire connections: A loose wire nut creates a tiny gap. Electricity jumps this gap, creating heat, sparks, and potentially an electrical fire inside your ceiling.
- Damaged insulation: Frayed or brittle wire insulation can allow the hot and neutral wires to touch, causing a severe short circuit.
- Crossed hot and neutral wires: Reversing these wires can cause a direct short, resulting in a loud pop and a tripped breaker.
- Missing grounding: Without a proper ground wire connection, stray voltage has nowhere safe to go, increasing the risk of shock and arcing.
- Overloaded electrical boxes: Cramming too many wires into a small junction box can crush insulation and force bare wires together.
- Faulty switches: Sometimes the spark originates at the wall switch, not the fixture itself. A failing switch can arc internally.
It is important to distinguish between a tiny, static-like pop from a capacitor discharging (common in some modern LED drivers) and dangerous, continuous arcing. If you see bright flashes or hear a loud buzz, you have a serious wiring error that must be fixed immediately.
Safety First: Before You Touch the Fixture
Electrical safety is non-negotiable. Before you start your project, complete this pre-installation safety checklist:
- Turn off the correct circuit breaker: Locate your main electrical panel and switch off the breaker controlling the light. Place a piece of tape over the switch so no one accidentally turns it back on while you are working.
- Use a non-contact voltage tester: Confirm the wires are completely dead before touching them.
- Wear insulated gloves and rubber-soled shoes: These provide an extra layer of protection against accidental shock, especially in damp areas.
- Use insulated tools: Screwdrivers and pliers with thick rubber grips prevent current from traveling up the tool and into your hand.
- Set up a sturdy ladder: Use a fiberglass or wooden ladder, never an aluminum one. Have a helper hold the base, especially for heavy fixtures.
You should also perform a “live-dead-live” test. First, test your voltage tester on a known live source (like an outlet) to ensure the tester’s battery works. Next, test the fixture wires to confirm they are dead. Finally, retest the tester on the live source to prove it did not fail during the process. Always use a voltage tester before electrical work begins to guarantee your safety. Manufacturers and safety guidance commonly instruct users to disconnect power before installation and verify all connections are tight before restoring current [genlyte].
Tools and Materials You’ll Need
Gathering the right equipment makes the job smoother and safer. Here is what you need for a spark-free installation:
- Non-contact voltage tester or digital multimeter
- Insulated screwdrivers (Phillips and flathead)
- Wire strippers and diagonal cutters
- Wire nuts or push-in connectors
- Electrical tape
- Sturdy ladder and ladder stabilizer
- Mounting bracket and grounding screw (usually included with the new fixture)
- LED-compatible fixture and appropriate bulbs
Why do insulated tools matter? If a live wire accidentally touches the metal shaft of a standard screwdriver, the current travels straight into your hand. Insulated tools feature a thick, non-conductive barrier that stops the current, drastically reducing your risk of injury. A reliable voltage tester is equally crucial; it is your only way to verify that the power is truly off before you begin wiring a light fixture.
Choosing the Right Light Fixture for Your Home
Not all light fixtures are created equal. When selecting a new luminaire, you must consider weight limits, ceiling-box ratings, environmental factors, and proper electrical box support. Standard ceiling electrical boxes are typically rated to hold up to 50 pounds. If you are hanging a heavy chandelier, you may need to upgrade the box or install independent structural support.
You must also check damp- and wet-location ratings. Bathrooms, covered porches, and outdoor lighting require fixtures specifically rated to handle moisture. Furthermore, ensure your new fixture is compatible with LED bulbs, especially if you plan to use a dimmer switch. Luminaires and retrofit kits should always be listed for their intended application. Strict NEC light fixture requirements, specifically Article 410, cover the rules for luminaires, lampholders, and lamps, ensuring they meet rigorous safety standards [ecmweb].
Here is a quick comparison of common fixture types to help you choose the right DIY project:
| Fixture Type | Difficulty Level | Typical Location | DIY Suitability |
|---|---|---|---|
| Flush-Mount | Easy | Hallways, Bedrooms, Low Ceilings | Excellent for beginners |
| Pendant Light | Easy to Moderate | Kitchens, Dining Areas | Great, requires height adjustment |
| Chandelier | Moderate to Hard | Foyers, Dining Rooms | Requires helper, check weight limits |
| Recessed (Can) | Hard | Living Rooms, Kitchens | Better for new construction or pros |
| Outdoor | Moderate | Porches, Garages, Pathways | Must be wet/damp rated, weather-sealed |
Step-by-Step: Light Fixture Installation Without Sparks
Let’s walk through a practical example: replacing an old, dated dining-room flush-mount light with a modern, energy-efficient LED fixture. Follow these numbered steps to ensure a safe ceiling light installation.
- Identify and switch off the breaker: Go to your electrical panel and turn off the correct breaker. Leave a note on the panel to warn others.
- Confirm power is off: Use your non-contact voltage tester on the wall switch and the fixture wires. It should remain completely silent and dark.
- Remove the old fixture: Unscrew the canopy or finial holding the old light to the ceiling. Carefully lower it, supporting its weight so it does not yank the wires.
- Inspect the electrical box: Check the junction box wiring. Ensure the box is securely attached to the ceiling joist and shows no signs of heat damage or melting.
- Connect the wires: Match the wires by color. Connect black to black (hot), white to white (neutral), and ground to ground.
- Secure wire connectors: Twist the wire nuts on tightly. Give each wire a gentle tug to ensure it will not pull out. Ensure no bare copper is exposed outside the wire nut.
- Attach the fixture canopy: Carefully tuck the wires into the electrical box. Align the new mounting bracket and secure the canopy without pinching any wires.
- Install the correct bulb: Screw in the LED bulb, ensuring it does not exceed the fixture’s maximum wattage rating.
- Restore power and test: Turn the breaker back on and flip the wall switch. Your new light should illuminate smoothly.
Understanding light fixture wiring colors is essential. The black wire is the “hot” wire carrying the electrical current. The white wire is the “neutral” wire, which completes the circuit. The green or bare copper wire is the ground. The fixture’s metal parts should be grounded where required to provide a safe path for stray electricity, significantly reducing shock risk [electricalflux].
How to Prevent Sparks at Every Connection
Preventing electrical arcing requires attention to detail at every stage of the project. Keep these practical tips in mind to avoid electrical sparks:
- Never work with the breaker on: This sounds obvious, but many DIYers rush and skip this vital step.
- Do not rely only on a wall switch: A switch can be wired incorrectly or fail internally. Always kill power at the main panel.
- Strip only the necessary amount of insulation: Exposing too much bare wire increases the chance of accidental contact. Use the gauge holes on your wire strippers for a perfect cut.
- Make tight, secure wire-nut connections: A loose connection creates resistance, which generates heat and sparks.
- Avoid overcrowding the junction box: If the box is too small for the number of wires, upgrade to a deeper electrical box.
- Check for damaged wiring: In older homes, wire insulation can become brittle and crumble. If you see cracked insulation, stop and call a pro.
- Use the correct bulb wattage: Never install a 100-watt bulb in a fixture rated for 60 watts. The CPSC recommends using the correct wattage bulb for the fixture to prevent overheating and melting wires [cpsc].
Common Mistakes That Cause Sparks
Even careful DIYers can make errors. Review this table to identify and avoid the most dangerous pitfalls during your home lighting upgrade.
| Mistake | Why It’s Dangerous | How to Avoid It |
|---|---|---|
| Testing only at the switch | The switch might be wired on the neutral wire, leaving the fixture live. | Always test the actual wires at the ceiling box with a voltage tester. |
| Reversing hot and neutral | Can cause a short circuit and shock hazard even when the light is off. | Double-check wire colors. Connect black to black, white to white. |
| Leaving ground disconnected | Stray voltage has no safe path, increasing shock risk. | Always connect the bare copper/green wire to the grounding screw. |
| Using the wrong wire connector | A connector that is too large will fall off; too small won’t secure all wires. | Use the correct size wire nut for the gauge and number of wires. |
| Overfilling the box | Crushed wires can short out and spark inside the wall. | Calculate box fill volume; upgrade the box if necessary. |
| Heavy chandelier without support | The fixture could rip the electrical box out of the ceiling. | Fixtures over 50 pounds require independent structural support under NEC guidance [electricalflux]. |
When to Call a Licensed Electrician
Knowing your limits is a crucial part of DIY electrical safety. While replacing a simple flush-mount light is usually straightforward, certain red flags mean you should stop immediately. If you encounter complex issues, do not hesitate to search for a licensed electrician near me. Call a professional if you encounter:
- Aluminum wiring: Older homes sometimes have aluminum branch circuits, which require special connectors and anti-oxidant paste to connect safely to copper fixture wires.
- Burnt smells or scorch marks: This indicates previous overheating or a hidden short circuit inside the wall.
- Flickering after installation: If the new light flickers or buzzes, you may have a loose neutral or an incompatible dimmer switch.
- Unknown wiring: If you open the ceiling box and see a confusing mess of wires that do not match standard colors, do not guess.
- No ground wire: Homes built before the 1960s often lack a grounding wire. An electrician can help you safely upgrade the circuit or install a GFCI-protected fixture.
- Frequent breaker trips: If the breaker trips immediately when you turn it back on, you have a dead short.
- Corroded electrical box: Rust and corrosion compromise the structural integrity and safety of the connection.
Hiring a licensed electrician is the safest choice for complex or older electrical systems. It ensures your home meets local codes and protects your family from fire hazards.
LED Fixtures and Modern Lighting Safety
Upgrading to LED light fixture installation is one of the best ways to improve your home’s energy efficiency. LEDs run much cooler than traditional incandescent bulbs, reducing the risk of overheating the fixture or the wiring inside the ceiling box. However, modern lighting still requires correct wiring, compatible dimmers, and proper grounding.
Many older dimmer switches were designed for high-wattage incandescent loads. If you install an LED fixture on an old dimmer, the light may flicker, buzz, or spark. Always check if your dimmer is “LED-compatible.” Additionally, pay close attention to damp- and wet-location ratings. If you are installing a porch light or a bathroom vanity fixture, the luminaire must be rated to handle moisture. Proper weather-sealing prevents water intrusion, which can cause short circuits and corrosion over time [thespruce].
FAQ Section
Here are answers to the most common questions homeowners ask about DIY light fixture replacement.
- Can I install a light fixture without turning off the breaker?
No. Working on live wires is incredibly dangerous and violates basic electrical safety protocols. Always shut off power at the main panel. - Why did my new light fixture spark when I turned it on?
This usually indicates a short circuit, a loose wire connection, or reversed hot and neutral wires. Turn off the breaker immediately and inspect your connections. - What if my ceiling has no ground wire?
If your home lacks a ground wire, you cannot safely ground the metal fixture. You may need to replace the fixture with a non-metallic one, install a GFCI breaker, or have an electrician run a new grounded cable. - How do I know which breaker controls the light?
Turn on the light, then go to your panel and flip breakers one by one until the light goes off. Alternatively, use a circuit tracer tool. - Can I install a chandelier myself?
Yes, if your ceiling box is rated for the weight. If the chandelier weighs more than 50 pounds, you must install a heavy-duty support brace directly into the ceiling joists. - Are LED light fixtures safer than incandescent fixtures?
Generally, yes. LEDs emit very little heat, reducing the risk of scorching the electrical box or starting a fire. However, they still carry electrical current and must be wired correctly. - When should I never DIY a light fixture installation?
Never DIY if you encounter aluminum wiring, burnt wires, a missing ground wire in a wet location, or if you feel uncertain about identifying the correct circuit.
Conclusion
A successful, spark-free installation comes down to preparation, verified power shutoff, correct wiring, and secure connections. By taking the time to test your wires, strip them properly, and use the right connectors, you can safely upgrade your home lighting. Always respect the power of electricity, follow the National Electrical Code guidelines, and recognize when a project exceeds your skill level.
Disclaimer: This article is for educational purposes only and does not replace local electrical codes, manufacturer instructions, or professional advice. Electrical work carries inherent risks of shock and fire. Always consult a qualified professional if you are unsure about any aspect of your home’s electrical system.
If you’re unsure about any wiring step, contact a licensed electrician before restoring power.