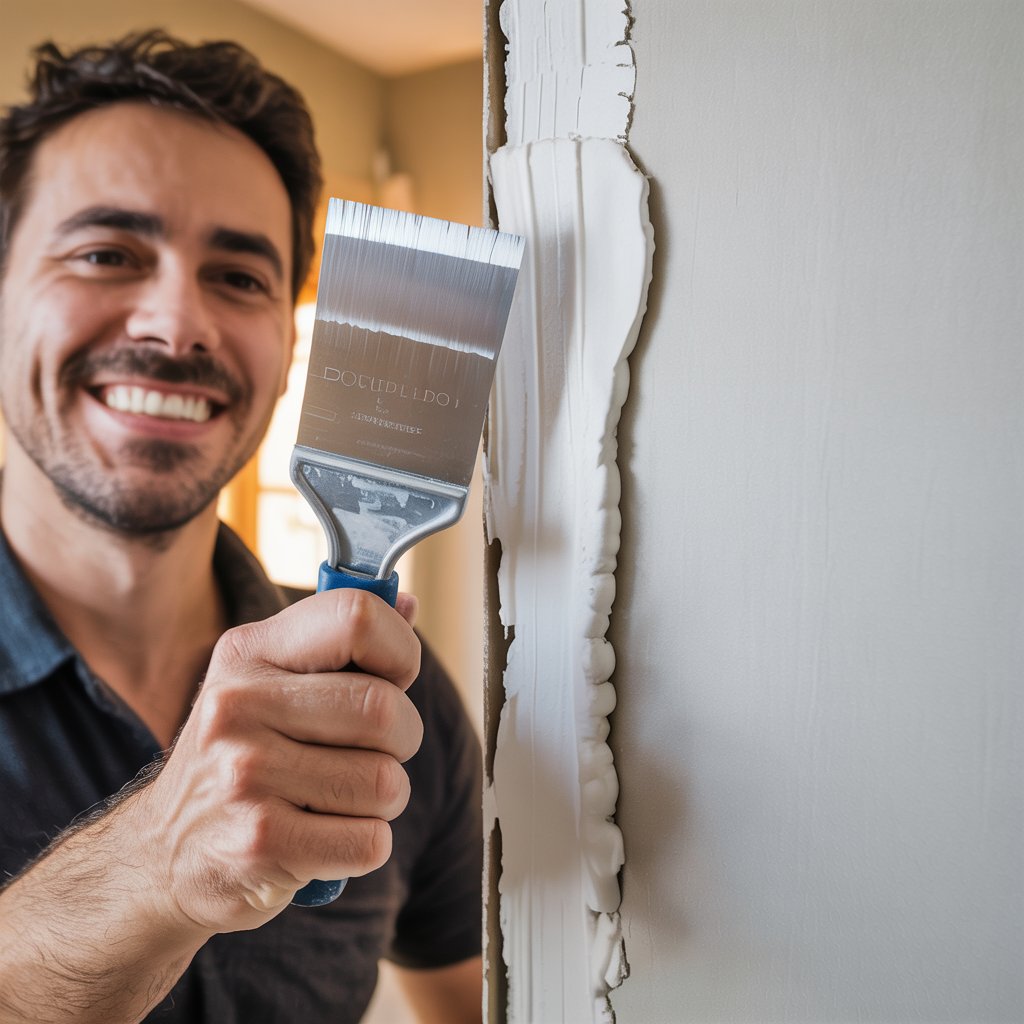
That sickening thud when the doorknob punches through your bedroom wall? Or the spiderweb of cracks that appeared after your house settled last winter? We’ve all been there. 80% of homes have minor drywall issues per HomeAdvisor, and hiring a pro costs $100–$300 per repair—enough to make your wallet weep. But here’s the secret no contractor wants you to know: 95% of drywall damage is DIY-able, even for total beginners.
I learned this the hard way when my toddler turned our living room into a wrestling ring (RIP drywall corner). After three failed YouTube tutorials, I finally cracked the code: drywall repair isn’t about skill—it’s about technique. With the right tools and patience, you can fix holes, cracks, and dents for under $50 while saving hundreds. No fancy certifications, no expensive gear—just smart, step-by-step methods that actually work.
In this DIY drywall repair guide, you’ll learn:
- Exactly which tools to buy (skip the $200 “pro kits”!)
- How to patch any hole size—from nail pops to basketball-sized gashes
- Why skipping primer causes “ghost seams” (and how to avoid them)
- Pro sanding tricks for walls smoother than your grandma’s china
- When to call a pro (spoiler: 90% of the time, you don’t need to!)
Whether you’re prepping for a house sale, fixing kid-induced chaos, or just tired of staring at that eyesore, this is your confidence boost. By the end, you’ll repair drywall like a seasoned pro—with zero experience required. Let’s turn those “oh no!” moments into “heck yes!” victories.
Why Every Homeowner Should Master DIY Drywall Repair
Think drywall repair is just for handymen? Think again. Learning DIY drywall repair saves you $50–$100 per fix compared to pros—and that’s before factoring in service fees. But it’s not just about cash. There’s pure magic in erasing years of wear: the doorknob dings from chaotic mornings, the cracks from winter settling, the anchor holes from your 17th furniture rearrangement.
Why it matters:
- Cost control: Pros charge $75–$150/hour. A $35 repair kit handles 10+ holes.
- Speed: Fix a hole today instead of waiting weeks for a contractor.
- Pride: That smooth, paint-ready wall? You did that.
- Prevention: Small cracks become big problems if ignored (hello, mold!).
Most damage comes from everyday life: kids slamming doors, furniture bumps, or house settling (especially in homes over 5 years old). The best part? You only need 2–4 hours per repair—and most beginners nail it on their second try. Your walls deserve love. Let’s give it to them.
Tools and Materials You’ll Need (Beginner Edition)
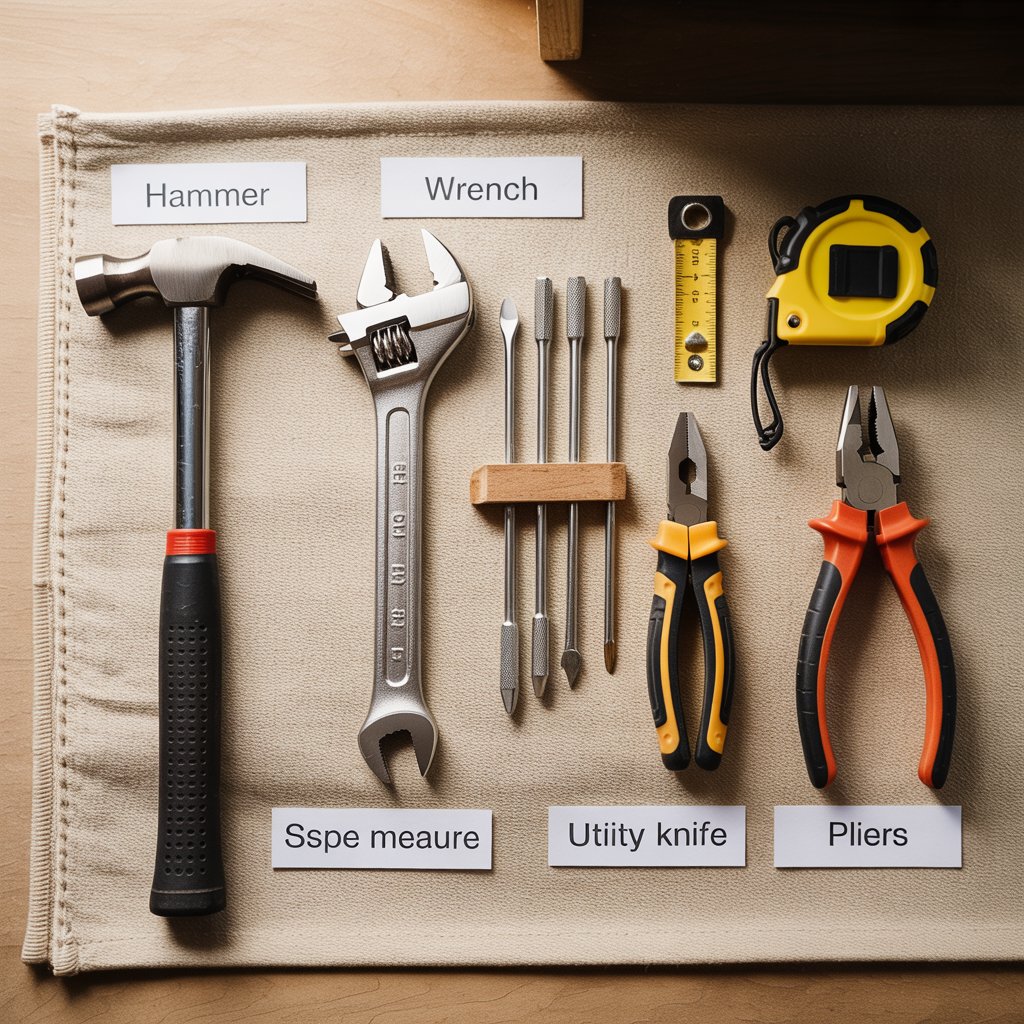
Forget intimidating “drywall toolkits.” For small drywall repair, you need just 6 core items. Skip the power tools—this is beginner-friendly.
Must-Have Essentials ($30–$40 Total)
| Tool/Material | Purpose | Beginner Tip |
|---|---|---|
6" putty knife | Spreading compound | Buy a $5 flexible one—rigid knives leave ridges |
Utility knife | Cutting drywall/tape | Replace blades often—dull = ragged edges |
Mesh drywall tape | Reinforcing patches | Self-adhesive = foolproof for beginners |
All-purpose joint compound | Filling holes | Premixed “easy sand” type (e.g., Sheetrock®) |
120-grit sandpaper | Smoothing | Use a sanding sponge for curves |
Primer + paint | Final finish | Zinsser Bullseye 1-2-3 blocks stains |
Nice-to-Haves (Skip for Small Jobs)
Drywall saw: For cutting large holes cleanlyCordless drill: Securing backer boards (use#6 drywall screws)Shop vac: Minimizes dust (drywall = chalky nightmare)
Safety Gear (Non-Negotiable!)
N95 dust mask: Drywall dust irritates lungsSafety goggles: Flying debris happensDrop cloth: Trust me—compound will drip
💡 Pro Tip: Buy a “drywall repair kit” (like Husky 5-Piece Kit) for $15—it includes tape, mud, and knives. Perfect for first-timers!
Safety First: Prep Like a Pro (Don’t Skip This!)
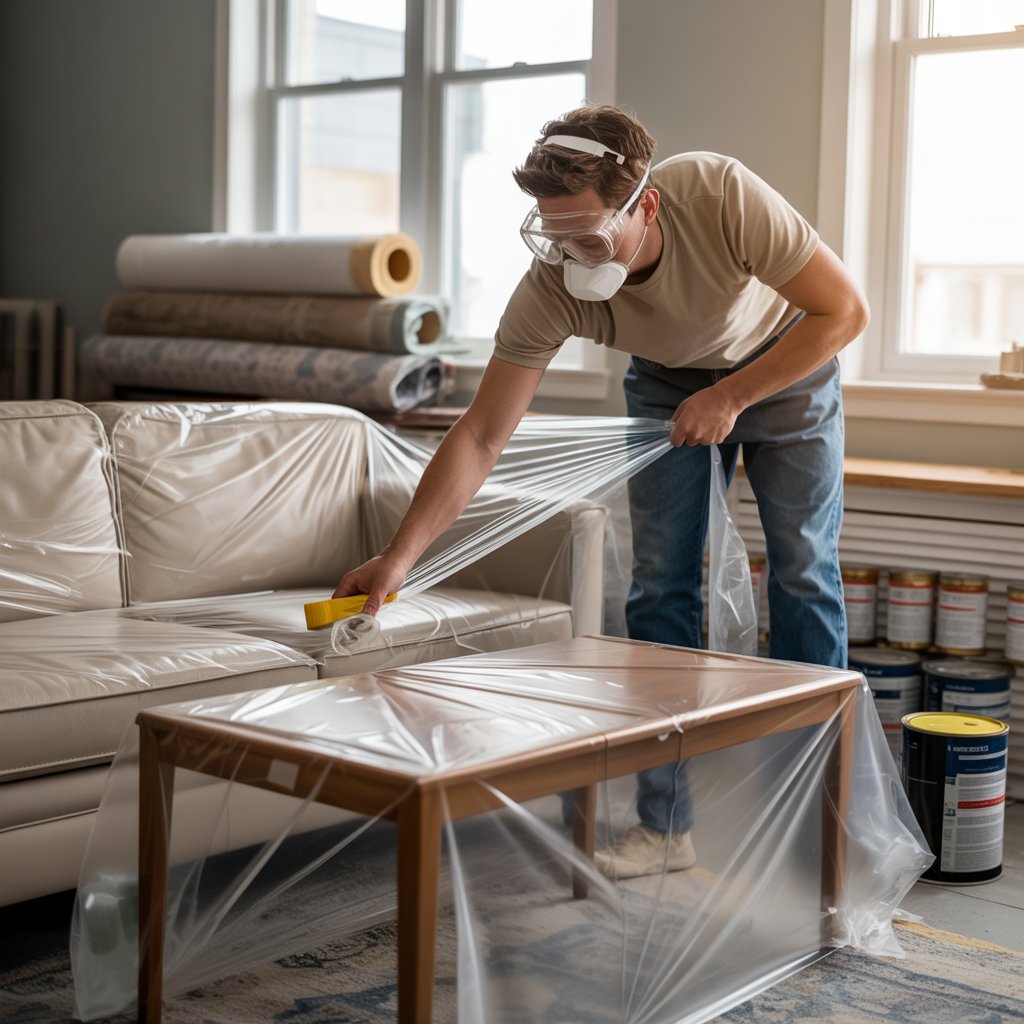
Drywall repair is messy. Protect yourself and your space:
- Clear the area: Move furniture 6+ feet away.
- Seal the zone: Tape plastic sheeting over doorways (prevents dust migration).
- Wear gear: Goggles + mask = non-negotiable. Drywall dust is not your friend.
- Work in sections: Repair one hole at a time—compound dries fast!
⚠️ Critical: Turn off electrical breakers if working near outlets. Water damage? Fix the leak first—or your repair will fail.
🔧 Core Repair Guides: Your Step-by-Step Fix-It Toolkit
Fixing Small Dents and Nail Pops (Under 1/2″)
Nail pops (where drywall screws push through the surface) and dents are the easiest fixes. Here’s how:
- Clean the area: Wipe dust with a damp cloth. Let dry.
- Apply compound: Scoop
joint compoundonto your2" putty knife. Press firmly into the dent—overfill slightly. - Sand lightly: Once dry (2–4 hours), use
120-grit sandpaperin circles. Feather edges. - Repeat: Apply 2–3 thin coats, sanding between. Pro Tip: Thinner coats = smoother finish!
- Prime and paint: Seal with primer before matching paint.
💡 Pro Tip: For nail pops, tap the screw deeper with a drill before patching—it won’t reappear!
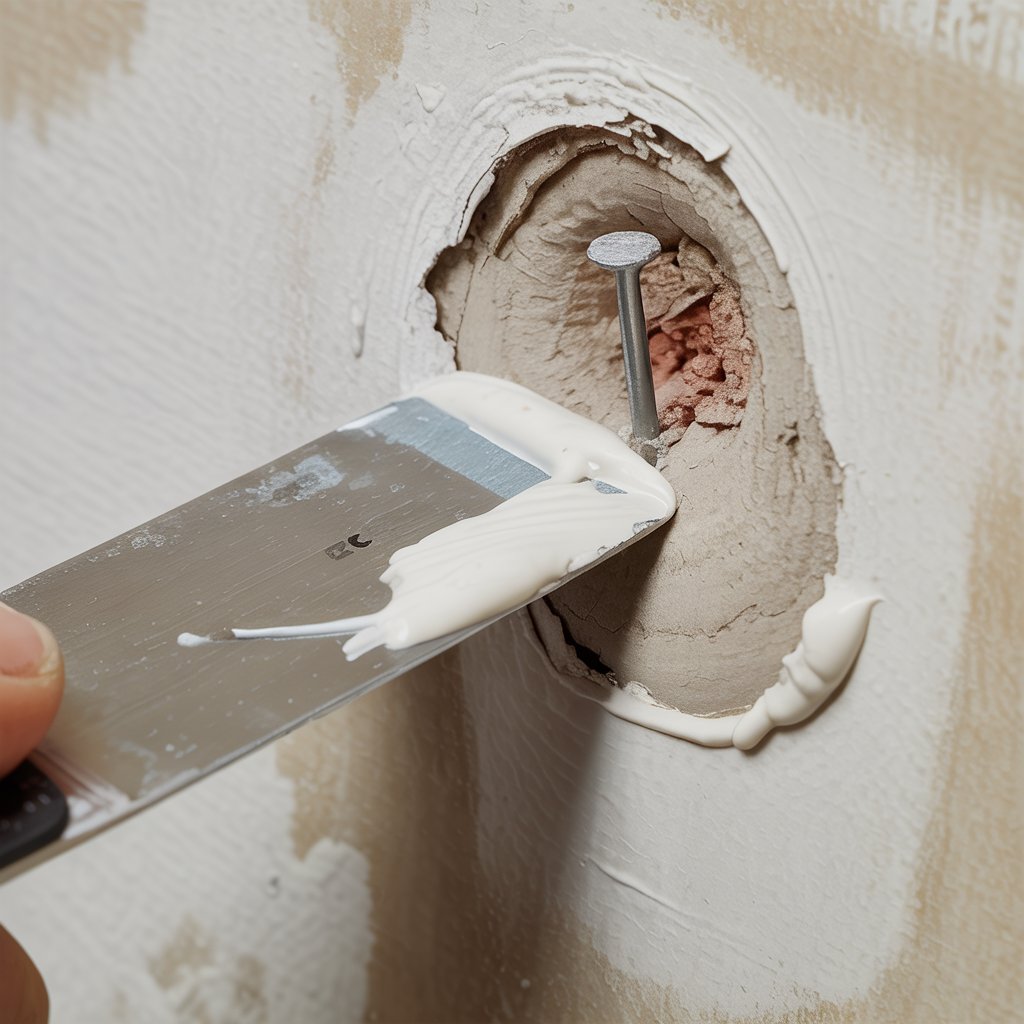
Patching Small Holes (<6 Inches) – The California Patch Method

This foolproof method works for doorknob holes, anchor pulls, and fist-sized gashes. No cutting studs required!
- Square the hole: Use a
utility knifeto cut a clean square/rectangle around the damage. Why? Ragged edges = weak patch. - Apply mesh tape: Press self-adhesive
mesh drywall tapeover the hole. Smooth bubbles. - First mud coat: Cover tape with
joint compoundusing a6" putty knife. Feather edges outward. - Second coat: After 24 hours, apply wider coat (extends 2″ beyond first).
- Final coat: Next day, apply thin coat 4″ wider. Let dry 24+ hours.
- Sand and prime: Use
220-grit sandpaperfor glass-smooth finish.
💡 Pro Tip: Dampen tape before applying mud—it bonds better! PreserveOurTower.com confirms this cuts sanding time by 50%.
Repairing Large Holes (>6 Inches)
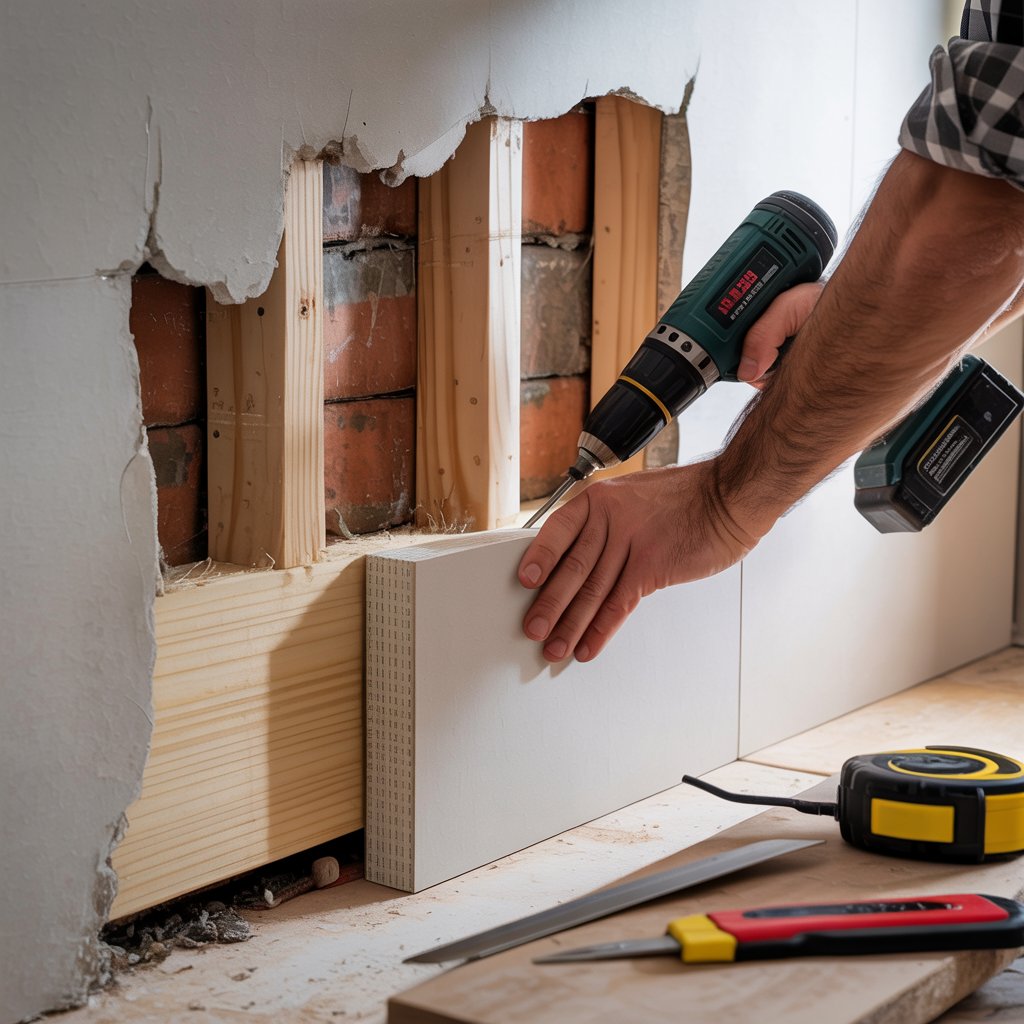
Holes from furniture crashes or plumbing work need structure. Here’s the eclipse patch method (no pro skills needed!):
- Cut to studs: Use a
drywall sawto cut a rectangle between two studs (max 16″ apart). - Build a backer: Screw a
1x3 wood striphorizontally inside the hole (usedrywall screwsthrough the wall edges). - Cut patch: Measure hole, cut new drywall 1/4″ smaller.
- Attach patch: Screw drywall to backer.
- Tape seams: Apply
paper drywall tapeover joints. - Mud and sand: 3 coats of compound (wider each time), sanding between.
💡 Pro Tip: Angle screws slightly into the backer—they won’t pop out! BudgetHomeCrafters notes this prevents “bump-back” failures.
Repairing Cracks from Settling or Water Damage
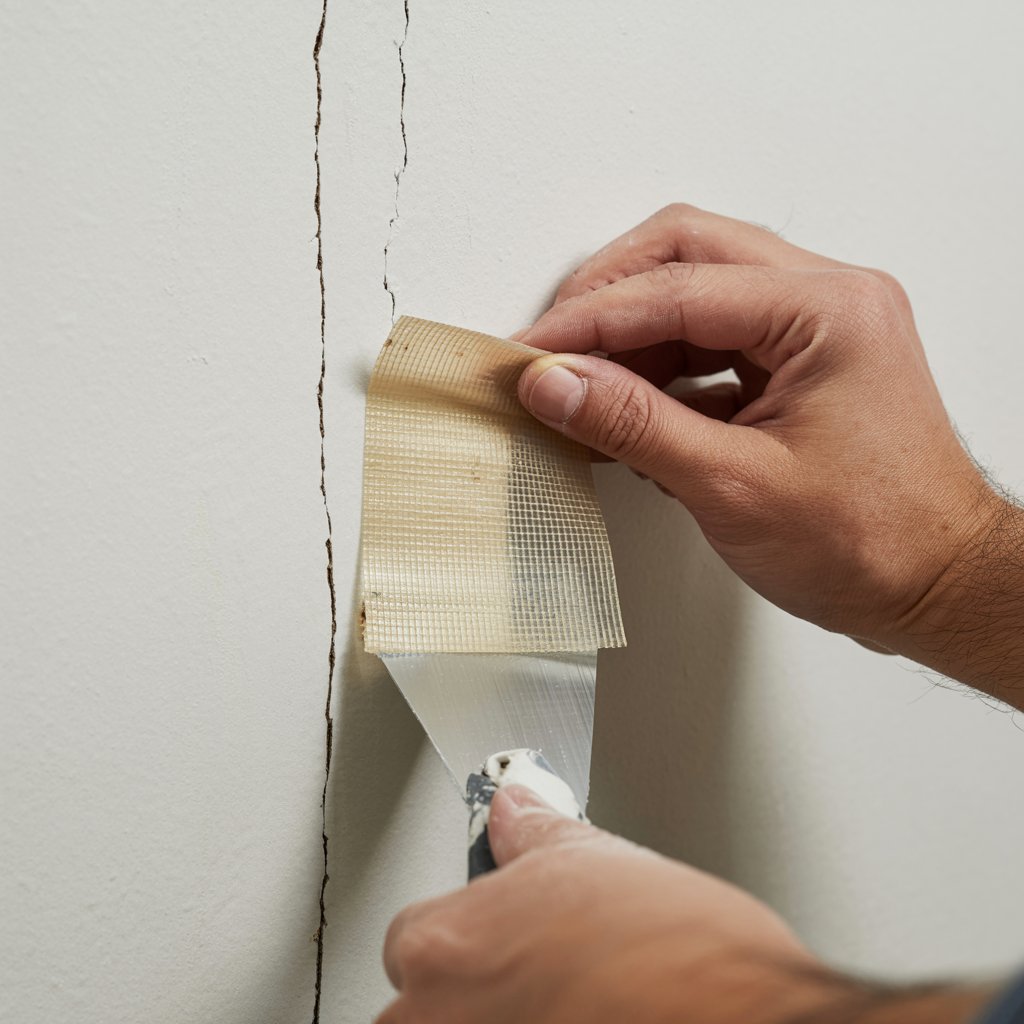
Hairline cracks (common near windows/doors) need flexible treatment:
- Widen the crack: Use a
utility knifeto V-groove it (1/8″ deep). Removes loose debris. - Apply tape: Press
fiberglass mesh tapeover the crack. - Thin compound coat: Use a
4" putty knifeto embed tape. Don’t over-apply! - Feather edges: Wipe outward with minimal pressure.
- Second coat: After 24 hours, apply slightly wider coat. Sand lightly.
- Prime immediately: Blocks moisture stains from water damage.
⚠️ Warning: If cracks reappear, consult a structural engineer—this could signal foundation issues.
Finishing Touches: Sanding, Priming, and Painting
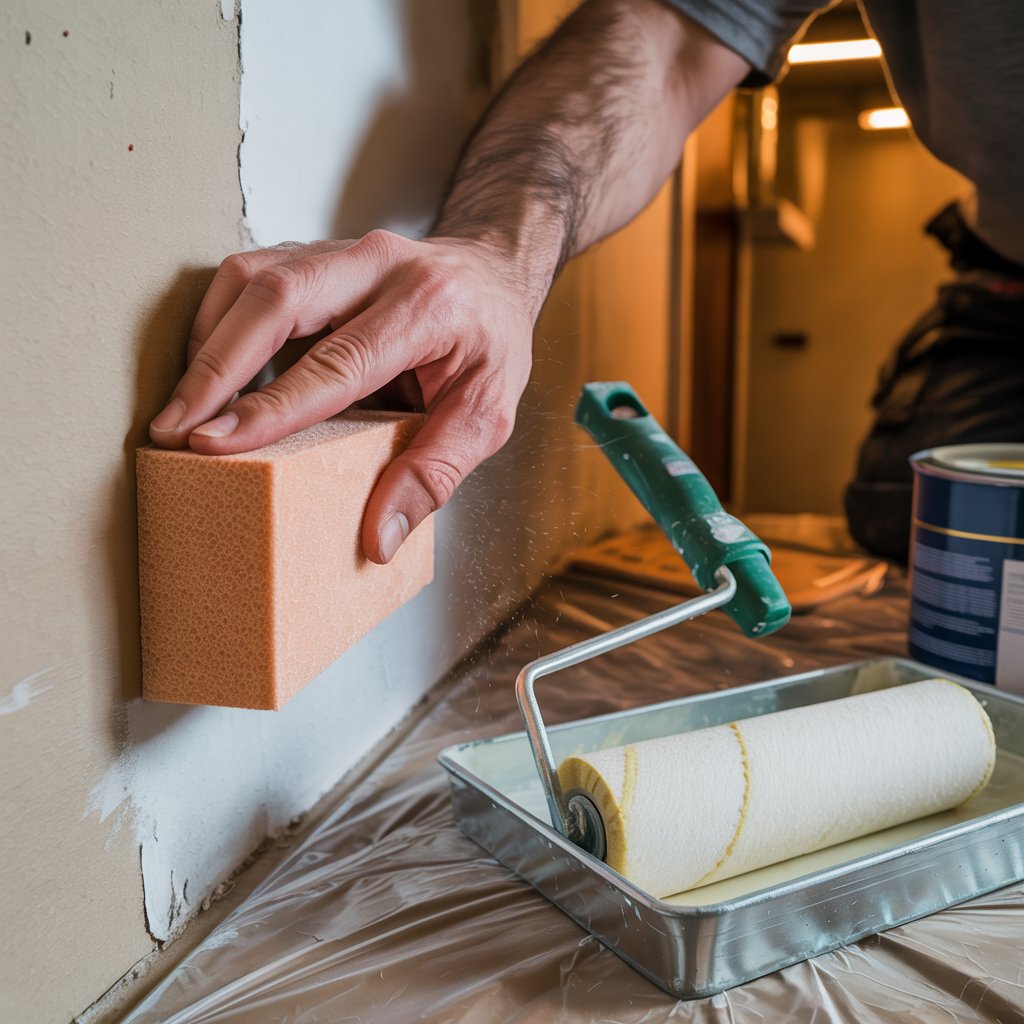
This is where DIYers fail—but not you! The secret to invisible repairs:
- Sanding: Start with
120-gritto knock peaks, finish with220-gritfor silkiness. Always sand in circles! - Priming: Skip this = “flashing” (repair shows through paint). Use stain-blocking primer like Zinsser.
- Painting: Feather edges with a small roller. For textured walls, dab a damp sponge while paint is wet.
💡 Pro Tip: Hold a work light sideways against the wall—shadows reveal imperfections. Sand until zero shadows!
Common Mistakes to Avoid (Save Yourself the Headache)
Don’t sabotage your hard work:
- ❌ Applying thick mud coats: Causes cracks and endless sanding. Solution: Thin layers only!
- ❌ Skipping primer: Repairs “ghost” through paint. Always prime first.
- ❌ Rushing drying time: Compound needs 24 hours between coats. Patience = perfection.
- ❌ Using spackle for large holes: It shrinks! Stick to joint compound for patches >1/2″.
- ❌ Over-sanding: You’ll cut through paper. Stop when surface feels smooth.
When to Call a Pro (Don’t Risk It)
Most repairs are DIY-friendly, but call a pro if:
- Water damage covers >10 sq ft (hidden mold risk)
- Cracks are wider than 1/4″ or near foundations
- Drywall feels soft/spongy (structural weakness)
- Your home was built before 1980 (asbestos suspicion)
💡 Rule of thumb: If you’re unsure, snap a photo and ask a pro for a $25 consult—they’ll tell you if it’s DIY-safe.
Conclusion: Your Walls, Transformed
You’ve got this. DIY drywall repair isn’t about being perfect—it’s about progress. That hole from last Tuesday’s moving disaster? In 48 hours, it’ll vanish. Those settling cracks? Gone by Sunday. Remember: every pro started exactly where you are now. Grab your putty knife, follow these steps, and join the club of homeowners who fix things instead of fearing them.
Your action plan:
- Buy the $15 repair kit today.
- Pick one small hole to tackle this weekend.
- Share your before/after in the comments—we’ll cheer you on!
FAQ: Your Top Drywall Repair Questions Answered
Q: How long should I wait between compound coats?
A: Minimum 4 hours for thin coats, but 24 hours is ideal for full curing. Humidity slows drying—use a fan!
Q: Can I use spackle instead of joint compound?
A: For small drywall repair (nail holes/dents), yes! But for patches >1/2″, joint compound is stronger and less prone to cracking. Spackle shrinks on large areas.
Q: Why does my patch look darker after painting?
A: You skipped primer! Unprimed drywall soaks up paint, causing “flashing.” Always seal repairs with stain-blocking primer first.
Q: How do I match textured walls?
A: Dab a damp sponge or drywall knife on wet paint. For knockdown texture, scrape lightly with a trowel. Practice on cardboard first!
Q: Can I repair water-damaged drywall?
A: Only if the damage is small and the leak is fixed. Cut out soggy sections, install a new patch, and prime with mold-resistant primer.
Q: What grit sandpaper should I use?
A: Start with 120-grit for heavy sanding, finish with 220-grit for silky smoothness. Sanding sponges beat paper for curves!
Q: My repair cracked—what went wrong?
A: Likely too-thick compound or skipped tape. Sand smooth, reapply mesh tape, and use 3 thin coats.