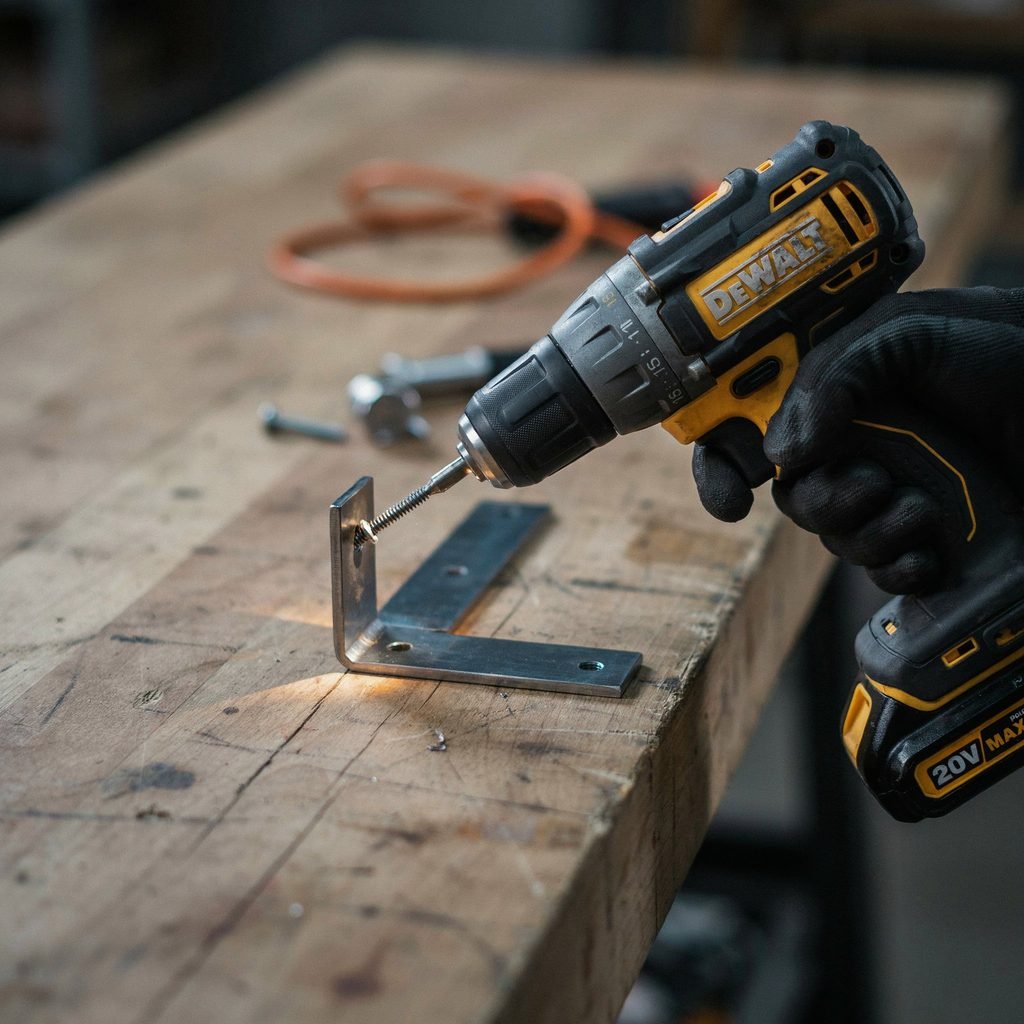
There are few things more frustrating to a DIYer than a loose screw in metal that just won’t cooperate. Whether it’s a hinge on a metal storm door, a bracket on your vehicle, a loose panel on the dishwasher, or the frame of your favorite patio furniture, a fastener that keeps spinning, fails to grip, or backs out over time compromises the integrity of your project. If your metal screw won’t tighten or seems to be floating in an oversized screw hole, you might feel like the whole component is ruined and needs to be replaced.
Fortunately, you don’t always need to scrap the entire metal fixture. Figuring out how to tighten a loose screw in metal is a fundamental DIY metal repair skill that can save you hundreds of dollars in replacement parts. In most cases, a failing fastener is the result of a simple mechanical issue—like debris, vibration, or worn threads—that can be remedied with basic tools and a little bit of know-how. This comprehensive guide will walk you through the reasons fasteners fail, the safety precautions you must take, and provide practical, step-by-step solutions to get your hardware locked in tight and lasting for years.
Why Do Screws Become Loose in Metal?
Before you can fix the issue, it helps to understand why a screw keeps spinning in metal or backs out in the first place. Unlike wood, which is a soft, fibrous material that compresses and grips the threads of a screw, metal is rigid. Metal doesn’t “give,” which means a stripped screw hole in metal usually happens for a few specific, identifiable reasons:
- Worn Threads or Oversized Holes: Over time, the female threads inside a tapped metal hole can wear down from repeated assembly and disassembly. If a previous repair used a screw that was too small, or if the hole was drilled out slightly too wide, the screw will never achieve the friction required to stay tight.
- Constant Vibration: Appliances, vehicles, lawnmowers, and HVAC equipment vibrate constantly during operation. This mechanical shaking acts like a slow-motion hammer, gradually loosening metal fasteners and causing screw backing out over weeks or months.
- Thermal Expansion and Contraction: Metal expands in the heat and contracts in the cold. This constant shifting and microscopic movement can break the static friction holding a screw in place, eventually allowing it to rotate backward.
- Corrosion and Rust: A rusted metal screw can seize up entirely, but the rust process can also eat away at the surrounding threads. This leaves a hollow, pitted, and stripped cavity that a standard screw cannot grip.
- Improper Screw Size or Overtightening: Using the wrong thread pitch (e.g., trying to force a fine-thread metric screw into a coarse-thread Imperial hole) or applying too much force with a high-torque drill driver can easily result in stripped threads in metal.
Safety First Before You Start Your DIY Metal Repair
Safety should always be your top priority when working with metal hardware, sharp shavings, and power tools. Before attempting any of the fixes below, make sure you follow these critical precautions:
- Disconnect Power: If you are working on an electrical box, a major appliance, an automotive battery terminal, or HVAC equipment, always unplug the device or turn off the main breaker to avoid severe electrical shocks.
- Wear Safety Glasses: Drilling, tapping, or scraping metal creates sharp, razor-like shavings that can easily fly into your eyes. High-impact eye protection is non-negotiable.
- Use the Right Tools: Using a worn or incorrect screwdriver bit will cause the tool to cam-out, stripping the screw head further and potentially injuring your hand. Always use the exact size and drive type required.
- Avoid Forcing Fasteners: If a metal screw won’t tighten and you feel extreme resistance or hear a loud clicking sound, stop immediately. Forcing it will only cause more catastrophic damage to the metal housing.
- Secure the Workpiece: If the metal part is removable, clamp it securely in a vise. Trying to tighten a screw on a loose, spinning piece of metal is a recipe for a slipped drill bit and a damaged workpiece.
How to Tighten a Loose Screw in Metal: 7 Step-by-Step Fixes
Let’s get into the practical solutions. We’ve ordered these methods from the easiest, least invasive fix to the more advanced metal screw hole repair techniques. Start with Fix #1 and only move down the list if the previous method fails.
1. Tighten the Screw Correctly Using the Right Tool
Sometimes the problem isn’t the hole, but the tool being used. If you are using a #2 Phillips bit on a slightly recessed or worn #1 Phillips head, the bit will slip and spin uselessly.
- Identify the Drive Type: Examine the screw head closely. Is it Phillips, slotted, Torx (star), square (Robertson), or hex?
- Select the Perfect Fit: Choose a perfectly fitting screwdriver bit or hand screwdriver. The bit should sit deep in the screw head without any wobbling.
- Apply Downward Pressure: When turning the screw clockwise, apply firm, steady downward pressure to keep the bit fully engaged in the screw head.
- Control Your Torque: If using a drill driver, set the clutch to a low torque setting. For critical or delicate metal repairs, switch to a manual hand screwdriver so you can “feel” when the threads are gripping properly, preventing accidental overtightening.
2. Clean Rust, Paint, and Debris from the Threads
A layer of dried paint, heavy grease, or rust can prevent a screw from threading properly. This often makes it feel like the hole is stripped when it is actually just clogged with debris.
- Remove the loose screw entirely from the assembly.
- Use a small wire brush, a dental pick, or a piece of stiff wire to scrape out debris from the threaded hole.
- Blast the hole with compressed air to remove loose metal shavings and dust.
- For a heavily rusted metal screw, soak the hardware in a penetrating oil or a dedicated chemical rust remover. Scrub the threads clean with a wire wheel attachment on your drill.
- Wipe everything down with a clean, lint-free rag and a degreaser before attempting to rethread the screw.
3. Apply a Thread-Locking Compound for Vibration Issues
If your screw holds torque initially but eventually backs out due to vibration (a very common issue on lawnmower decks, automotive interior panels, and AC compressor mounts), a thread-locking compound is your best friend.
- Clean the screw threads and the inside of the metal hole with a brake cleaner, degreaser, or rubbing alcohol. Let it dry completely.
- Apply a single, small drop of medium-strength thread-locking fluid (often known generically by the popular brand name Loctite) to the threads of the screw. Do not use high-strength (red) thread locker unless you never intend to remove the screw again, as it requires extreme heat to break the bond.
- Drive the screw back into the metal to the proper tightness.
- Allow the anaerobic compound to cure (usually 10 to 24 hours) before subjecting the part to movement, vibration, or heavy loads.
4. Step Up to a Slightly Larger Screw
If the original hole is slightly worn, stretched, or stripped, the simplest and most effective fix might be upsizing your hardware.
- Remove the original screw and use a set of digital calipers to measure its exact diameter and thread pitch.
- Find a replacement machine screw that is one gauge size larger (for example, moving from a #10-24 to a #12-24) but features the exact same thread pitch (the 24 indicates threads per inch).
- The slightly larger diameter will bite into the unworn, virgin metal on the outer edges of the hole, creating a tight, secure fit.
Note: Do not force a drastically larger screw into a small hole, as the outward pressure can crack brittle cast metal or split thin aluminum housings.
5. Use Self-Tapping Screws to Create New Threads
When dealing with thin sheet metal, ductwork, or automotive body panels where traditional machine screws strip easily, self-tapping screws are an excellent workaround.
- Remove the old stripped screw and clean the hole.
- Select a self-tapping sheet metal screw (such as a Tek screw) that is slightly wider than the original hole.
- Using a drill driver, drive the self-tapper directly into the hole at a moderate speed.
- The sharp, aggressive, widely-spaced threads of the self-tapper will drill through and cut brand-new threads into the surrounding sheet metal, providing a secure grip without needing a pre-tapped hole.
6. Repair Stripped Threads with a Thread Repair Kit
For thicker metal where you must maintain the exact same bolt size (such as on an engine block, a heavy-duty bracket, or a bicycle frame), a thread repair kit (often referred to by the brand name Heli-Coil) is the ultimate professional solution.
- Use the kit’s specified drill bit to carefully drill out the old, stripped threads in metal. Use cutting oil to keep the bit cool and prevent it from wandering.
- Tap the newly drilled hole with the special oversized tap included in the kit to create new threads designed specifically for the insert.
- Screw the coiled steel threaded insert into the hole using the provided installation tool. The insert acts as a bridge between the damaged metal and your original screw.
- Use the break-off tool to snap off the installation tang at the bottom of the insert.
- The insert now provides a brand-new, factory-fresh threaded hole of the exact original size, often stronger than the original factory threads.
7. Install a Rivet Nut, Threaded Insert, or Backing Plate
What if the metal is too thin for a Heli-Coil, or the hole is blown out completely into a massive crater?
- Rivet Nut (Nutsert): If you have access to the back of the sheet metal, a rivet nut can be inserted into the oversized hole and crimped with a special nutsert tool. This leaves a strong, threaded steel nut permanently anchored in the thin metal, ready to accept a standard machine bolt.
- Backing Plate: If you are working on a hollow metal tube or a panel with a cavity behind it, you can feed a small steel backing plate on a piece of string through the hole. Hold the string while driving a long bolt through the main hole and threading it into the plate. Once tight, the plate acts as an oversized washer inside the wall, securing the repair.
8. Know When to Replace the Hardware Entirely
Sometimes, DIY metal repair reaches its physical limit. If the metal bracket is cracked, the appliance housing is crumbling from galvanic corrosion, or the threaded hole is adjacent to a critical stress fracture, attempting to tighten it is just a temporary band-aid. In these cases, replacing the metal component, the hinge, or the entire bracket is the only safe and lasting option.
How to Choose the Right Replacement Screw
If you decide to swap out the hardware entirely, using the correct screw size and type is critical for a lasting repair. Keep these factors in mind when shopping at the hardware store:
- Screw Diameter and Thread Pitch: Machine screws have specific thread counts (e.g., 1/4″-20 vs. 1/4″-28). The threads must match the female threads in the metal exactly. Forcing mismatched threads will cause cross-threading, permanently destroying the hole. A cheap thread pitch gauge is a great tool to keep in your toolbox.
- Length: The screw should be long enough to engage at least three to four full threads inside the metal hole to achieve maximum shear strength, but not so long that it bottoms out in a blind hole and prevents the head from tightening against the surface.
- Head Type: Ensure the head sits flush or doesn’t interfere with moving parts. Countersunk (flat head) screws require a beveled hole to sit flush. Pan heads and hex washer heads sit on top of the surface and provide excellent clamping force.
- Material and Coating: For outdoor fixtures, marine environments, or areas exposed to moisture, always use stainless steel or heavily hot-dipped galvanized metal fasteners. Using standard zinc-plated steel outdoors will result in a rusted metal screw within a year.
- Drive Type: Consider upgrading to Torx or Square (Robertson) drive screws. They are vastly superior to Phillips heads for metalwork because they resist cam-out and allow you to apply much higher torque without stripping the head.
Preventing Future Loosening and Screw Backing Out
Once you have successfully repaired the hole and tightened the screw, take these proactive steps to ensure the hardware stays tight for the life of the product:
- Use Vibration-Resistant Fasteners: Consider replacing standard hardware with serrated flange bolts or vibration-resistant screws that have built-in locking mechanisms or nylon patches on the threads.
- Add Lock Washers: A split lock washer or an internal-tooth star washer placed under the screw head adds immense tension and bites into the metal surface, heavily resisting rotational loosening.
- Nylon-Insert Lock Nuts: If you are using a bolt and nut setup rather than a tapped hole, always use a nylon-insert lock nut (nyloc nut) to prevent backing out.
- Proper Torque: Use a calibrated torque wrench for critical components like lug nuts or engine brackets. Overtightening stretches the bolt past its yield point and strips threads, while undertightening allows vibration to take over.
- Safety Wiring: For high-vibration environments like motorcycles or aircraft components, drill a small hole through the head of the bolt and use stainless steel safety wire to physically tie the bolt to an adjacent stationary point.
- Periodic Inspection: Make it a seasonal habit to check the fasteners on your vehicle panels, heavy furniture, deck hardware, and outdoor power equipment. Catching a slightly loose screw early prevents the hole from stripping out entirely.
Common Mistakes to Avoid When Fixing a Stripped Screw Hole in Metal
Even experienced DIYers make errors when working with metal. Avoid these common pitfalls to ensure your repair holds:
- Using the Wrong Screwdriver: Forcing a Phillips bit into a stripped Torx or Square screw guarantees a ruined head, making extraction a nightmare. Always match the driver perfectly.
- Drilling Oversized Holes: When trying to clean out a dirty hole with a drill bit, using a bit that is even a fraction of a millimeter too large will permanently erase the threads, forcing you to use a thread repair kit.
- Ignoring Corrosion: Simply tightening a screw into a rusted, pitted hole without cleaning it guarantees the repair will fail again in a few months as the rust continues to spread beneath the surface.
- Using Wood Screws in Metal: Wood screws have coarse, widely spaced threads designed to bite into soft fibers. They will easily strip out of sheet metal under any tensile load and should never be used for structural metal repairs.
- Applying Too Much Thread Locker: A massive glob of thread-locking compound can wick into adjacent moving parts, freeze the mechanism, or make future removal nearly impossible without applying a blowtorch. One small drop is all you need.
- Cross-Threading: Always start threading a metal screw by hand. If you use a drill driver to start the screw and it is slightly misaligned, you will cut new, incorrect threads across the original ones, ruining the hole instantly.
When to Call a Professional
While figuring out how to tighten a loose screw in metal is a standard and highly rewarding DIY task, some situations require professional intervention. Stop immediately and call a licensed pro if you are dealing with:
- Structural Metal: Beams, joist hangers, deck ledgers, or structural brackets that support the physical weight of your home.
- Automotive Safety Components: Brake calipers, suspension control arms, steering linkages, or seatbelt anchors must be torqued to exact factory specifications using specialized tools.
- Gas Appliances: Never attempt to repair or tighten fittings on a natural gas line, propane tank, or gas furnace. The risk of a lethal leak is too high.
- Electrical Panels: Loose connections or stripped screws inside a main breaker box can cause arcing and catastrophic electrical fires.
- HVAC Refrigerant Lines: High-pressure copper lines and specialized blower motor mounts require EPA-certified technicians to repair safely.
How to Tighten a Loose Screw in Metal: Frequently Asked Questions
Why does a screw keep coming loose in metal?
The most common culprits are constant vibration (like from an engine or washing machine), thermal expansion causing the metal to shift, or the threads inside the hole becoming worn and stripped over time, which prevents the screw from maintaining a tight friction grip.
How do you fix a screw hole that is stripped in metal?
You can fix a stripped screw hole in metal by stepping up to a slightly wider screw, using a self-tapping screw to cut new threads, or installing a threaded insert (like a Heli-Coil) to replace the damaged threads with a brand-new steel coil.
Can I use Loctite on a loose metal screw?
Yes, medium-strength thread-locking compounds (often referred to by the brand name Loctite) are highly effective for metal fasteners subjected to vibration. Just ensure the screw and hole are completely clean and degreased before applying a small drop to the threads.
What size screw should I use if the original hole is too big?
Look for a screw that is one gauge size larger in diameter than the original, but maintains a similar thread pitch. Alternatively, switch to a self-tapping sheet metal screw that is wide enough to bite into the untouched metal on the outer edges of the oversized screw hole.
Can I use a self-tapping screw in metal?
Absolutely. Self-tapping screws are specifically designed to drill and cut their own threads into sheet metal and soft metals. They are an excellent, fast solution for repairing thin metal where a standard machine screw keeps spinning.
How tight should a metal screw be?
A metal screw should be tightened until it is “snug” and the head is seated flush against the surface, plus a slight turn to ensure tension. If you are working on automotive or structural parts, always refer to the manufacturer’s exact torque specifications and use a torque wrench to prevent stripped threads in metal.
Final Thoughts: How to Tighten a Loose Screw in Metal
Dealing with a stripped or spinning fastener doesn’t mean your expensive project is doomed to the scrap heap. Knowing how to tighten a loose screw in metal allows you to salvage high-end appliances, restore vintage furniture, and keep your home’s fixtures secure and safe. From a simple drop of thread-locking compound to installing a professional-grade threaded insert, you have a wide variety of tools at your disposal to make permanent, lasting repairs. The key is to accurately diagnose why the hole failed, avoid forcing the hardware, and choose the correct fix for your specific metal thickness and application.
Don’t let a wobbly hinge, a rattling vehicle panel, or a loose appliance handle turn into a major breakage down the road. Grab your tools, put on your safety glasses, and inspect those loose fasteners around your house today!