Why Summer AC Readiness Matters
When triple-digit heat rolls across the US, a struggling air conditioner isn’t just uncomfortable—it’s a health risk, an energy-budget buster, and a ticking time bomb for costly emergency repairs. According to the Department of Energy, cooling accounts for roughly 16% of the average US household’s annual energy bills [external link suggestion: link to ENERGY STAR’s “Home Sealing” or “A Guide to Energy-Efficient Heating and Cooling” at energystar.gov], and that number spikes dramatically during prolonged heat waves from Phoenix to Philadelphia.
The good news? Most mid-summer AC breakdowns are preventable. A thorough summer AC maintenance routine—done once before the heat peaks and spot-checked monthly—can cut cooling costs by up to 15%, extend your system’s lifespan by years, and keep your home safe during the hottest days of the year.
This AC service checklist walks you through every essential step, from a simple filter swap to a full system load test. We include realistic time estimates, typical DIY costs in US dollars, clear safety notes, and honest guidance on when to call a licensed HVAC technician. Let’s get your cooling system summer-ready.
Quick Seasonal Timing Note: North vs. South
When you schedule your seasonal AC maintenance depends largely on where you live:
- Southern US (Texas, Florida, Arizona, Gulf Coast): Heat arrives early. Schedule your AC tune-up in February or March so you’re ready by April’s first hot spells.
- Midwest and Northeast: Late April through May is ideal—after last frost but well before June heat domes.
- Pacific Northwest and mild coastal zones: Timing can flex into May or even early June, since peak cooling demand often doesn’t hit until July.
The rule of thumb: service your system 4–6 weeks before your region’s typical first 90°F+ day.
Essential Quick-Glance AC Inspection Checklist
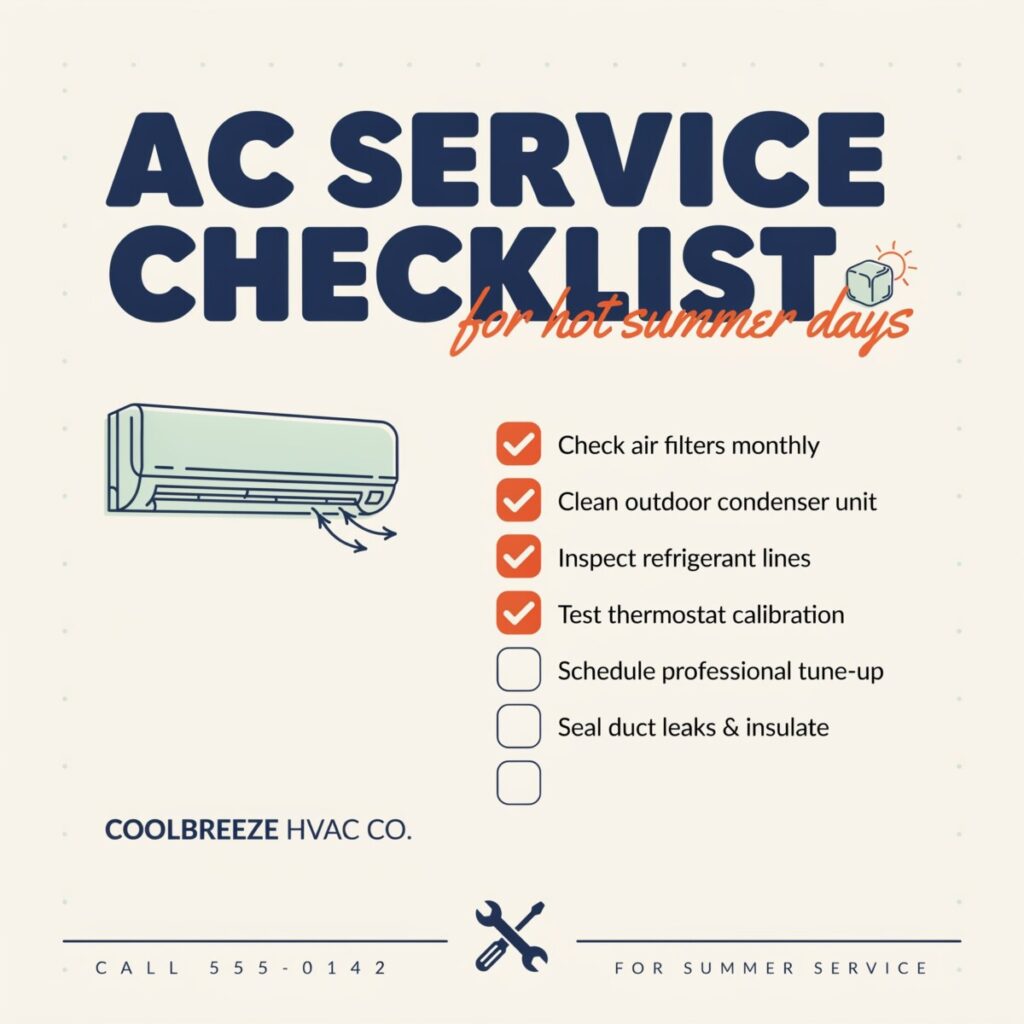
Before we dive deep, here’s the at-a-skim version. Print it, post it on the fridge, or bookmark it:
- [ ] Replace or clean air filters
- [ ] Clean condenser coils and clear outdoor unit area
- [ ] Check refrigerant levels and watch for leaks
- [ ] Inspect and clean evaporator coil and drain line
- [ ] Test thermostat and calibrate or upgrade
- [ ] Inspect electrical connections, fuses, and capacitors
- [ ] Lubricate moving parts and inspect belts
- [ ] Check airflow and ductwork for leaks or blockages
- [ ] Check and replace return and air-handler filters
- [ ] Test AC system under load
Detailed AC Service Checklist Items
1. Replace or Clean Air Filters
Why it matters: Clogged filters restrict airflow, forcing your system to work harder. This is the single biggest cause of reduced AC efficiency and frozen evaporator coils.
How to do it: Locate your filter (usually at the return grille or air handler). Slide the old one out, note its size and MERV rating printed on the frame, and insert a new one with the airflow arrow pointing toward the blower.
- Use MERV 8–11 filters for most residential systems. Higher MERV filters (13+) trap more allergens but may restrict airflow if your blower isn’t designed for them.
- Replace every 1–3 months during summer; monthly if you have pets or allergies.
Time: 5–10 minutes | Cost: $5–$25 per filter for quality MERV-rated options
When to call a pro: Rarely—unless your system uses a custom or hard-to-reach media filter cabinet.
2. Clean Condenser Coils and Clear Outdoor Unit Area
Why it matters: The outdoor condenser rejects heat from your home. A clogged or shaded unit can’t dump heat efficiently, causing high head pressure and compressor strain.
How to do it:
- Turn off power at the outdoor disconnect and at the breaker panel.
- Use gloved hands or a trimmer to clear 2 feet of clearance around the unit from grass, shrubs, and debris.
- Remove leaves from the top grille and vacuum loose debris from coils.
- Spray the condenser unit cleaning foam (available at hardware stores) on the coil fins, let sit, then gently rinse with a garden hose—never a pressure washer.
- Use a fin comb to straighten any bent aluminum fins.
Time: 30–45 minutes | Cost: $10–$25 for coil cleaner and fin comb
When to call a pro: If fins are heavily crushed, if the coil has visible corrosion, or if you’re uncomfortable working around electrical components.
3. Check Refrigerant Levels and Watch for Leaks
Why it matters: A refrigerant leak is the silent killer of central AC systems. Low charge causes ice on the suction line, reduced cooling, and eventual compressor failure.
Signs of low refrigerant: Hissing sounds at fittings, ice on the copper suction line, weak cooling despite clean filters, higher-than-normal electric bills.
Time: N/A (professional only) | Cost: Diagnostic fee $75–$150; leak repair and recharge $250–$1,500 depending on severity
When to call a pro: Always. Handling refrigerant requires EPA 608 certification. Homeowners should never attempt a DIY recharge.
4. Inspect and Clean Evaporator Coil and Drain Line
Why it matters: The indoor evaporator coil cleaning task is easy to forget but critical. A dirty coil reduces heat absorption, and a clogged condensate drain line is the #1 cause of summer water damage and emergency shutoffs.
How to do it:
- Locate the drain line (PVC pipe near your air handler) and the drain pan underneath.
- Pour 1 cup of distilled white vinegar down the drain line every 30 days during summer to prevent algae and mold buildup.
- If you see standing water in the pan or a drain line clog, use a wet/dry shop vac on the outdoor drain outlet to suction out the blockage.
- Check the coil access panel for heavy dust or frost—visual evaporator coil cleaning usually requires professional tools.
Time: 15–25 minutes (DIV line only) | Cost: $5–$15 for vinegar, $80+ for a shop vac if not already owned
Signs of mold/mildew: Musty smell when the AC runs, black residue near the drain pan, or allergic reactions when indoors.
5. Test Thermostat and Calibrate or Upgrade
Why it matters: A miscalibrated thermostat can make your system short-cycle or overshoot temperatures, wasting energy and straining components. Thermostat calibration is a high-impact, low-cost step.
How to do it: Tape a digital thermometer next to your thermostat, wait 15 minutes with the room still, and compare readings. If off by more than 2°F, check batteries first—then consider upgrading.
- Recommended summer setting: 78°F when home, 82–85°F when away. Each degree above 72°F saves roughly 3–5% on cooling costs.
- Upgrade option: A smart or programmable thermostat ($120–$250 installed) pays for itself within one cooling season through scheduling and geofencing.
Time: 10–30 minutes | Cost: Free (calibration check) to $250 (smart thermostat upgrade)
When to call a pro: For hardwired smart-thermostat installation if your system uses a heat pump or lacks a C-wire.
6. Inspect Electrical Connections, Fuses, and Capacitors
Why it matters: Loose or corroded connections cause overheating, arcing, and in rare cases, electrical fires. A failing capacitor is the most common mid-summer breakdown culprit.
How to do it (visual only for most homeowners):
- Turn off power at the breaker before opening any panel.
- Look for burnt/melted wire insulation, loose terminal screws, or discolored contactors.
- Test that the outdoor disconnect switch operates smoothly.
⚠️ Safety precaution: Capacitors store a dangerous electrical charge even when the power is off. Leave capacitor testing and replacement to professionals.
Time: 10–20 minutes visual; 30–45 minutes professional | Cost: Professional service $150–$400 for capacitor replacement
7. Lubricate Moving Parts and Inspect Belts
Why it matters: Many modern HVAC systems have sealed bearings, but older blower motors and belt-driven fan units need periodic lubrication. Dry bearings create friction, heat, and premature failure.
How to do it:
- Locate oil ports on the blower motor (small capped holes on each end).
- Add 5–10 drops of non-detergent SAE 20 electric-motor oil—never WD-40 or multi-purpose lubricant.
- Inspect belts for cracks, glazing, or fraying; replace if worn or if deflection exceeds ½ inch when pressed.
Time: 15–20 minutes | Cost: $5–$15 for oil and replacement belt
When to call a pro: If belts require tensioning or the motor is difficult to access.
8. Check Airflow and Ductwork for Leaks or Blockages
Why it matters: The US Department of Energy estimates 20–30% of conditioned air escapes through leaky ducts. Sealed ducts mean cooler rooms and lower bills.
How to do it:
- Walk through each room with the AC running. Weak airflow at registers signals a blockage or leak.
- Inspect visible ductwork in attics, basements, and crawl spaces for disconnected sections or visible gaps.
- Seal small joints with mastic sealant or UL-181-rated foil tape (not cloth duct tape—it peels within months).
- Make sure all supply and return registers are fully open and not blocked by furniture or rugs.
Time: 30–60 minutes for basic inspection | Cost: $10–$25 for mastic/tape
When to call a pro: For professional Aeroseal treatment ($1,500–$3,000) or full duct replacement.
9. Check and Replace Return and Air-Handler Filters
Why it matters: Beyond the main return filter, many homes have secondary filters at the air handler, inside-duct media cabinets, or on window/portable AC units.
- Central systems: Check the air handler’s secondary filter (if equipped) every 3 months.
- Window and portable units: Slide out the mesh pre-filter monthly, vacuum dust, and wash with mild soap. Most last 1–2 summers before full replacement.
- Mini-split systems: Open the front panel, remove the mesh filters, and wash every 2 weeks during heavy use.
Time: 5–10 minutes per unit | Cost: $5–$30 depending on filter type
10. Inspect and Test the AC System Under Load
Why it matters: The final validation step. A properly functioning system should produce a measurable temperature split between return and supply air.
How to do it:
- Run the AC for 15 minutes on the lowest thermostat setting and fan on “auto.”
- Measure air temperature at a return grille and at the nearest supply register with a digital thermometer.
- A healthy temperature split is 16–22°F. Less than 15°F suggests low refrigerant or coil issues; more than 24°F often means restricted airflow (dirty filter or coil).
- Listen for: Grinding, squealing, or loud buzzing (mechanical/electrical issues), rapid on/off cycling (short-cycling), or whistling at registers (airflow restriction).
Time: 20–30 minutes | Cost: Free with an existing thermometer
When to call a pro: If the split is outside the healthy range, or if unusual sounds or smells persist.
Energy-Saving Cooling Tips for Peak Summer
Small habits compound into big savings during a heat wave:
- Use ceiling fans (running counterclockwise in summer). They create wind chill that lets you raise the thermostat 4°F without losing comfort.
- Set programmable schedules to warm the house 4–6°F while no one is home. Smart thermostats automate this based on phone geofencing.
- Close blinds and curtains on south- and west-facing windows during afternoon hours—direct sun can raise indoor temps by 10°F+.
- Seal window gaps around AC units with weatherstripping or foam to prevent cooled air from escaping.
- Run heat-producing appliances (dryers, ovens, dishwashers) in early morning or late evening, not mid-afternoon.
- Keep routine maintenance current—a dirty system can use 20–30% more electricity than a tuned one.
When to Call a Professional
Don’t wait for comfort to collapse before calling. These red flags demand a licensed HVAC technician:
- Strange noises (grinding, screeching, loud buzzing)
- Burning smells or smoke from vents
- Frozen coils on the indoor or outdoor unit
- Rapid cycling (system turns on/off every few minutes)
- Water pooling around the air handler
- Visible refrigerant oil stains on copper lines (indicates a leak)
Typical emergency response time for most US HVAC companies is 4–24 hours during peak summer. Same-day service often costs a premium.
Typical professional service costs (US averages):
| Service | Typical Cost Range |
|---|---|
| Diagnostic fee | $75–$150 |
| Refrigerant recharge | $160–$400 |
| Capacitor replacement | $150–$400 |
| Compressor replacement | $1,200–$2,800 |
| Full seasonal AC tune-up | $85–$250 |
A Real-World Preventive Maintenance Win
📖 Click to read Maria’s story: how $35 saved her a $2,000 emergency repair
In July 2024, during a 108°F heat wave outside of Austin, Texas, homeowner Maria noticed her upstairs rooms weren’t cooling as well as usual. Instead of cranking the thermostat lower, she ran through this checklist. She replaced a 3-month-old MERV 11 filter that had clogged faster than expected (two dogs that shed), then poured vinegar down her condensate drain line—and immediately heard a gurgle as a slow-forming algae clog cleared. Two weeks later, a neighbor on her street experienced the same early warning signs, ignored them, and woke up to a flooded hallway and a $2,000 emergency repair bill for a burnt-out blower motor caused by restricted airflow. Maria’s 30-minute maintenance session and $35 in supplies saved her system—and her sanity—through the rest of the summer.
FAQ: Quick Answers to Your Top AC Questions
How often should I service my AC?
Schedule a professional AC tune-up once per year, ideally in spring. In between, homeowners should replace filters monthly during peak summer and visually inspect the outdoor unit every few weeks. Systems older than 10 years benefit from twice-annual service.
Can I clean condenser coils myself?
Yes. Turn off power at the disconnect, spray a foaming coil cleaner, let it sit, and gently rinse with a garden hose. Avoid pressure washers—they bend delicate aluminum fins. For heavily corroded coils, call a pro.
Is recharging refrigerant a DIY task?
No. Under EPA Section 608 rules, only certified technicians can legally handle refrigerants. Home kits sold online are ineffective on central AC and often make leaks worse. Leave it to a licensed HVAC technician.
What thermostat setting balances comfort and cost?
The US Department of Energy recommends 78°F when home and higher (82–85°F) when away. Pair this with ceiling fans, and you’ll save 10% or more on summer cooling without sacrificing comfort.
Safety Reminder
Before starting any air conditioner maintenance, turn off power at both the breaker panel and the outdoor disconnect switch. Never open electrical panels if standing on wet ground. Leave all refrigerant handling to EPA-certified technicians—it’s the law and a serious safety issue. Use sturdy ladders, wear gloves and safety glasses when working around sharp coil fins, and never bypass capacitors or fuses yourself. When in doubt, call a pro.
Conclusion: Stay Cool, Stay Smart
Summer heat waits for no one—and neither does a neglected air conditioner. Run through this AC service checklist before the first real heat wave hits, spot-check filters and the outdoor unit monthly, and schedule a professional AC tune-up once a year. You’ll save money, extend your system’s life, and avoid the dreaded 3 a.m. emergency call during the hottest week of July.
Take action today: print this list, tackle the 10 steps, and share it with a neighbor or family member who could use a cool, efficient summer. Your future self—and your electric bill—will thank you.