The morning after a severe storm, most homeowners head outside to check the roof and the fence — but the siding often tells the real story. High winds, hail, and flying debris can crack panels, pop nails, and break seals, allowing water intrusion behind siding where it quietly causes rot, mold, and costly structural damage.
The good news: most storm damage siding repair is very manageable when you catch it early. This guide walks you through safely assessing damage after wind, hail, or debris strikes, deciding between DIY fixes and hiring a pro, understanding 2026 repair costs, filing an insurance claim, and choosing materials that stand up to the next storm.
Whether you’re dealing with wind damage siding after a Plains squall or hail damage siding along the Gulf Coast, here’s exactly what to do next.
Why Storms Damage Siding (and Why It Matters)
Your siding is more than curb appeal. It’s the outer shell of a layered defense system that includes house wrap, sheathing, and framing. When that shell fails, everything behind it is at risk.
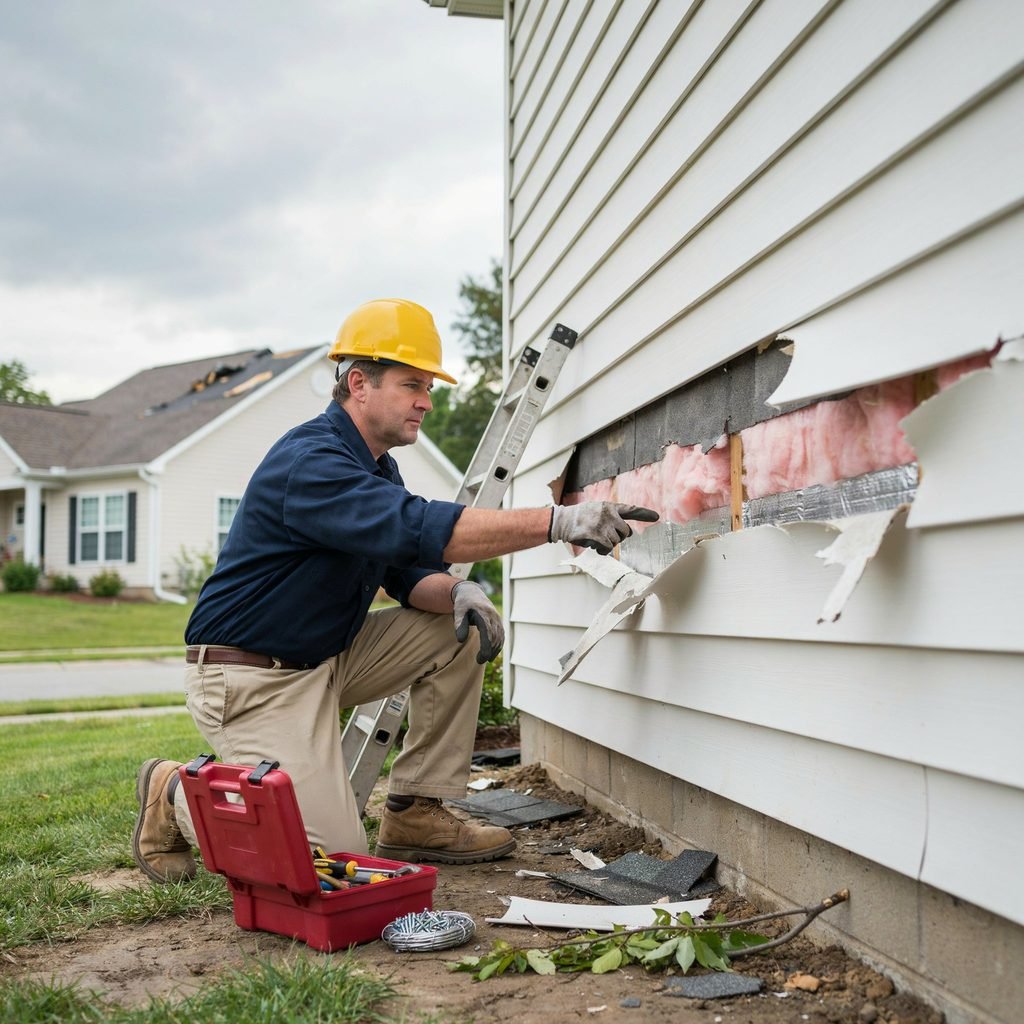
The most common threats behind wind damage siding claims:
- High winds: Gusts lift panels, break corner posts, and tear siding at seams and edges.
- Hail: Stones crack vinyl, dent aluminum, and chip fiber cement and stucco.
- Flying debris: Branches, gravel, and patio furniture become projectiles that puncture panels.
- Driving rain: Wind-driven rain exploits even hairline cracks, starting water intrusion behind siding.
When exterior wall damage repair is postponed, moisture soaks into the house wrap and sheathing, leading to wood rot, mold growth, ruined insulation, and pest entry. A $300 siding crack repair left alone can become a $5,000 sheathing and moisture barrier repair. House wrap and siding repair go hand in hand — fixing one without the other is a half-fix.
Risk varies by region. The Plains and much of the Midwest sit in “Hail Alley,” where hail storm home exterior damage is a near-annual event. Gulf and Atlantic coasts face hurricanes and driving rain, while the Midwest and Northeast see frequent severe thunderstorms with damaging straight-line winds. Wherever you live, acting quickly is the cheapest protection you have.
Safety First: What to Do Immediately After a Storm
More homeowners are injured during post-storm inspections than during the storm itself. Follow this order:
- Wait for the all-clear. Never go out mid-storm. Watch for downed power lines (treat all as live), unstable branches, and standing water near electrical equipment.
- Gear up. Heavy gloves, safety glasses, and sturdy closed-toe shoes protect against sharp metal edges, broken vinyl, nails, and splinters.
- Skip risky ladders. Don’t climb on wet, icy, or muddy ground or in gusty wind. Most of the home siding inspection checklist below can be done from the ground with binoculars or your phone’s zoom camera.
- Secure loose material. Gently fasten flapping panels or remove hanging pieces that could fall or let water in.
- Tarp large holes. Cover openings with a waterproof tarp, fastened above the damage so water sheds away from it. Keep receipts — emergency siding repair costs are often reimbursable through insurance.
These stopgaps aren’t permanent repairs, but they prevent water damage while you plan permanent siding repair after storm damage. For before-and-after severe weather safety guidance, see FEMA’s storm safety resources.
Step-by-Step Siding Inspection Checklist
Once it’s safe, walk the property systematically with your phone and a notebook.
1. Do a Ground-Level Walk-Around
Circle the house slowly and look for cracked, chipped, or shattered panels; dents (especially on aluminum and vinyl); missing pieces; loose trim, corner posts, or soffits; and impact or scrape marks from debris.
2. Check Vulnerable Zones
Damage concentrates where panels terminate: corners and corner posts, horizontal seams and overlaps, around windows, doors, and utility penetrations, and under eaves where wind-driven debris collects.
3. Look for Moisture Clues
Water intrusion behind siding often shows up subtly: warped, bubbling, or bulging panels or paint; dark streaks or algae; musty odors indoors; or damp drywall and water stains on exterior-facing walls — the classic signs of a siding leak after storm.
4. Test for Looseness
Gently press panels. Listen for rattling, check for lifted edges, and look for nail heads that have pushed out or pulled loose — siding nail pop repair is a classic sign of wind stress.
5. Inspect the House Wrap (If Visible)
Where a panel has come off, examine the weather barrier behind it. Tears, soaked insulation, or black or green mold mean moisture barrier repair is urgent, not cosmetic.
6. Document Everything
Take wide shots of each elevation plus close-ups of every damage point, and note the date and storm event. This record is gold for your insurance claim for storm damaged siding.
Suspect roof trouble too? Work through a full roof storm damage checklist next — roof and siding damage frequently happen together.
DIY vs Professional Siding Repair: When to Call a Pro
DIY-Friendly Repairs
- Small cracks or holes under 1 inch (siding crack repair with caulk or filler)
- A single damaged panel (first-floor siding panel replacement)
- Minor trim or corner cap damage at ground level
- Siding nail pop repair
If you’re comfortable on a stable ladder with basic tools, these DIY siding repair tips can save you a service-call fee.
Call a Pro When
- Multiple panels or large sections are damaged
- You suspect water intrusion, rot, or mold behind the siding
- Damage is above the first story or over difficult access
- Older siding needs color or profile matching
- Fiber cement, stucco, or structural trim is involved
- Your warranty or insurance requires a licensed contractor
The 50% Rule
When weighing siding replacement vs repair, get both estimates. If repair quotes exceed roughly half the cost of replacing that wall’s siding, full replacement is usually the better buy — uniform color, consistent performance, and one warranty instead of a patchwork.
Searching “siding contractor near me”? Verify licensing and insurance, manufacturer certifications, storm-damage references, and detailed written estimates. Knowing when to call a siding pro is the difference between paying once and paying twice for the same wall.
How to Repair Common Types of Storm Siding Damage
Vinyl Siding Repair
Vinyl is the most DIY-friendly siding. To replace a cracked panel, use a zip tool to unlock the panel above the damaged one, remove the nails, position the new panel, and re-zip the seam. Leave the manufacturer’s thermal expansion gaps at openings, and nail into the center of the slots without driving nails tight — overdriven nails cause buckling and future nail pops. Finish by sealing around windows and doors with exterior-grade caulk. The Vinyl Siding Institute publishes free installation specs.
Fiber Cement Siding Repair
Fiber cement is tough but brittle when struck. Cut out damaged sections with a circular saw and fiber cement blade, control silica dust with misting and a respirator, install new pieces with corrosion-resistant fasteners, and prime and paint to match. Follow the manufacturer’s installation guide exactly — between cutting and dust control, many homeowners leave fiber cement siding repair to certified pros.
Wood Siding Repair
Pry off rotted or split boards without tearing the house wrap, and treat adjacent framing with preservative. Replace with matching species and profile, and prime and paint all sides — including backs and ends — before installation. Then fix the moisture source, or the new board will rot too.
Aluminum Siding Repair
Small dents can be flattened with a rubber mallet or filled with automotive body filler. Severely bent panels are replaced much like vinyl, but the edges are razor-sharp — gloves are non-negotiable. Sand out corrosion and repaint with a metal-compatible exterior paint.
Stucco Repair After Storm
Chip cracked or spalled stucco back to sound material, apply a bonding agent, and rebuild in layers — scratch, brown, and finish — letting each cure properly before texturing and painting to match. Don’t postpone stucco repair after storm: cracks let water travel far behind the surface.
When any repair becomes a pro job: if you find soft sheathing, soaked wrap, or mold, stop. That’s exterior wall damage repair involving the wall structure, and it needs a professional to dry, replace, and flash it correctly.
Siding Repair Costs in 2026: What US Homeowners Pay
Here’s what siding repair cost in 2026 looks like across the US:
- Minor repairs: $150–$650 — small cracks, a single panel, caulking and sealing, nail pops.
- Medium repairs: $650–$2,400 — multiple panels, trim, corner posts, or a partial wall section.
- Major repairs: $2,400–$8,500+ — widespread hail or wind damage, rot, sheathing, and moisture barrier work.
Per square foot of repaired area, expect roughly $6–$20 per sq ft installed, depending on material and access.
What Pushes Costs Up
- Height and access: two-story walls and steep lots add labor and equipment.
- Material: fiber cement and stucco typically cost more to repair than vinyl; wood matching can also run pricey.
- Older homes: discontinued colors and profiles may require painting or replacing entire walls.
- Hidden damage: water intrusion behind siding often reveals rot only once panels come off.
- Regional labor rates: metro and coastal markets run higher than rural ones.
Get 2–3 detailed written quotes, ask what’s included (wrap, flashing, disposal), and confirm both workmanship and manufacturer warranty coverage. If the damage is storm-related, request line-item estimates your adjuster can use — it makes the siding replacement vs repair conversation much smoother.
Filing an Insurance Claim for Storm-Damaged Siding
Most HO-3 homeowners policies cover sudden wind and hail damage to siding — but not wear and tear or gradual deterioration. To give your claim the best chance:
- Read your policy before you need it. Know your wind/hail deductible and whether siding settles at actual cash value or replacement cost.
- Document before you clean up. Photos, video, and written notes are the backbone of your insurance claim for storm damaged siding.
- File promptly. Many policies set claim windows, and some states limit how long you can wait after a storm.
- Keep receipts for temporary protection. Tarps and emergency fixes are usually reimbursable.
- Bring your contractor to the adjuster’s inspection. A licensed pro can point out hail damage siding and wind damage an adjuster might miss and match scope to line items.
One caution: if only one wall is damaged and your policy pays actual cash value, matching discontinued siding can be a sticking point — some states require insurers to consider matching, others don’t. Ask your agent. For the full process, see our guide on how to file a home insurance claim.
Preventing Future Storm Damage: Materials and Upgrades
You can’t stop the next storm, but you can make your home a harder target.
- Choose impact-resistant siding. Engineered fiber cement, impact-rated vinyl (thicker gauges with reinforced nailing hems), and brick or stone veneer accents shrug off hail and debris that shatter economy panels — top picks for the best siding for storm-prone areas.
- Harden the details. Reinforce corner posts and trim, upgrade flashing around windows and doors, and install quality house wrap shingle-style so water sheds outward.
- Maintain the envelope. Refresh caulking, paint, and sealants every year or two; exterior home maintenance after storm is far cheaper than emergency repair.
- Manage the yard. Trim overhanging branches and anchor patio furniture and trash bins before severe weather.
- Know your warranty. Most manufacturer warranties cover defects, not hail strikes — understand siding warranty and storm damage terms before you buy, and note that some premium impact-resistant lines may even earn insurance discounts.
Combined with stronger roof-to-wall connections, these upgrades are whole-house storm hardening in a nutshell.
FAQ: Siding Repair After Storm Damage
How do I know if my siding needs repair or replacement after a storm?
Isolated cracks or dents usually mean repair; widespread hail hits, multiple loose panels, or moisture behind the siding point to replacement. The 50% rule settles most siding replacement vs repair debates.
Can I claim siding damage on homeowners insurance?
Usually yes for sudden wind or hail events, minus your deductible. Wear, tear, and gradual deterioration aren’t covered.
How long can I wait to repair storm-damaged siding?
Not long. Even small openings admit water in the next rain. Tarp immediately and aim for permanent repair within weeks.
What’s the most storm-resistant siding for US homes?
Engineered fiber cement and impact-rated vinyl lead the field; brick and stone veneer are tougher still but cost more.
Does DIY siding repair void my warranty or insurance?
Work that violates manufacturer installation instructions can void warranties, and insurers may question improper repairs. Small fixes are fine; major storm work belongs with licensed pros.
Conclusion: Act Fast, Protect the Shell
Storm damage siding rarely looks as bad as it is — but it almost never gets better on its own. A quick, safe inspection after every severe storm, honest documentation, and fast repairs keep a cracked panel from becoming rotted sheathing, mold remediation, or an insurance dispute.
Remember the formula: secure, inspect, document, repair or replace, then harden for the next storm.
Unsure about your siding’s condition? Contact a licensed siding contractor in your area for a free inspection and estimate — it’s the cheapest peace of mind you’ll buy all year.