Why Exterior Painting Prep Is 70% of the Job
You spent $400 on premium exterior paint. You rolled it on over a sunny Saturday. Two summers later, it’s peeling off your trim in long, curling strips. Sound familiar?
Here’s the truth most paint stores won’t emphasize: the paint itself is rarely the problem. The real culprit is almost always poor exterior painting prep.
Proper prep work—cleaning, scraping, repairing, sanding, caulking, and priming—determines whether your paint job lasts 7 to 10 years or fails within a single season. Skipping even one critical step can compromise adhesion, trap moisture, and invite mildew back under your fresh coat.
In this guide, I’ll walk you through every essential step of exterior house painting preparation: from your initial inspection to choosing the right weather window. Whether you’re tackling this as a DIY project or hiring professionals, understanding the process ensures you get lasting results—and protect your home’s value.
Let’s get started.
How Long Should a Properly Prepped Exterior Paint Job Last?
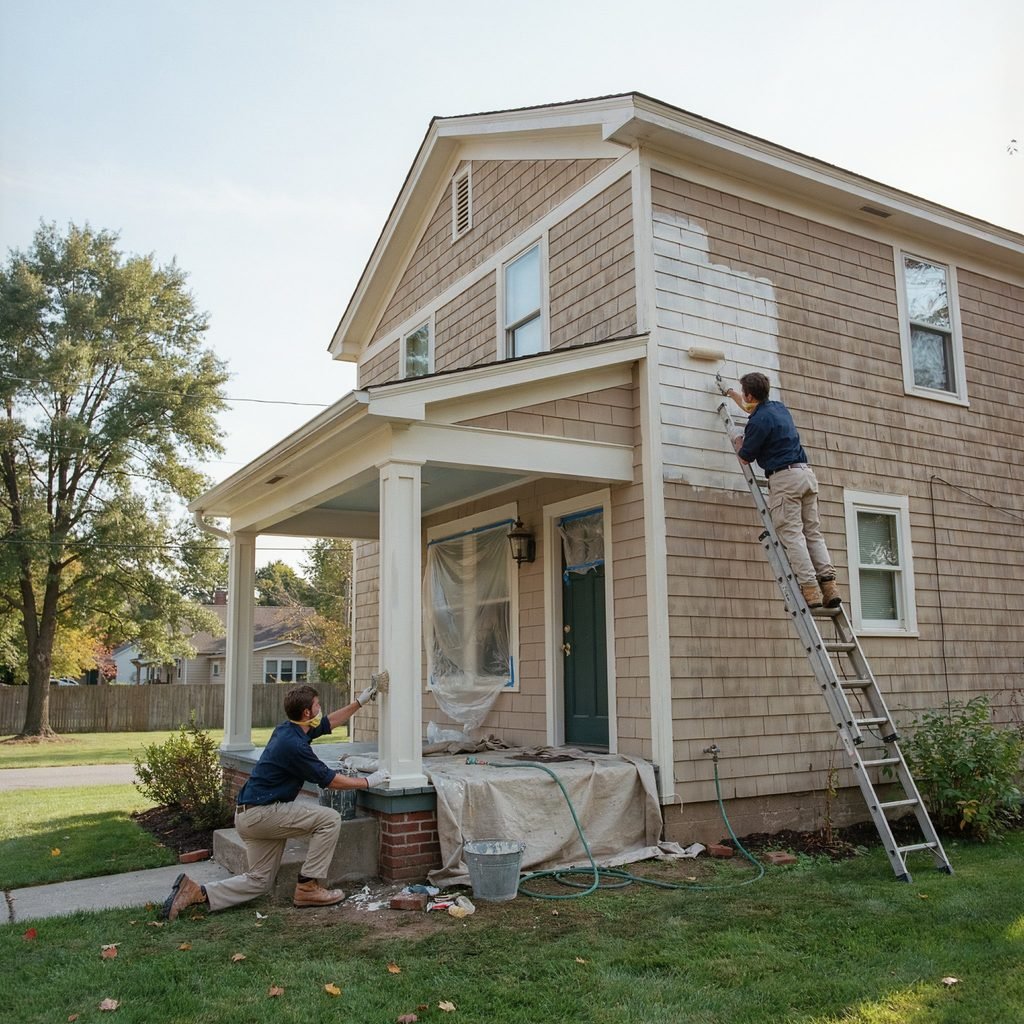
On a well-prepped surface using quality exterior paint, you should expect 7 to 10 years before repainting is needed. Fiber cement and properly sealed masonry can stretch even longer.
Skip the prep, though, and that timeline shrinks dramatically. Painting over chalky, dirty, or flaking surfaces can cause failure in as little as 12–18 months.
Several factors influence how long exterior paint lasts:
- Climate: Intense UV in the Southwest, heavy humidity in the Southeast, and freeze-thaw cycles in the Midwest all accelerate wear.
- Surface material: Bare wood demands more prep than vinyl or fiber cement. Stucco and brick need proper sealing.
- Paint quality: 100% acrylic latex paints outperform cheaper alternatives in flexibility and adhesion.
One of the best exterior painting tips for homeowners: invest your time and budget in preparation first. The paint is only as good as what’s underneath it.
Step 1: Full Exterior Inspection & Problem Mapping
Before you buy a single gallon of paint or rent a pressure washer, walk your home’s entire perimeter in full daylight. Bring a notepad or use your phone to photograph every issue you spot.
What to look for:
- Peeling, flaking, or blistering paint
- Cracks in caulk, siding, or stucco
- Gaps around windows, doors, and trim joints
- Soft, spongy, or discolored wood (signs of rot)
- Black or green mildew/algae patches (common on north-facing or shaded walls)
- Nail pops or rust stains
- Chalky residue (rub your palm across the surface—if it comes away dusty, the paint is degrading)
- Failed patches from previous repairs
Use binoculars for second-story areas and gable peaks. Don’t forget soffits, fascia boards, and the backside of your home where moisture lingers.
Document everything. This exterior painting checklist becomes your roadmap and prevents mid-project surprises that blow up timelines and budgets.
What happens if you skip this? You’ll discover rotted trim after you’ve already primed and painted around it—forcing you to redo entire sections.
Step 2: Cleaning the Surface (Pressure Washing & Mildew Treatment)
Dirt, pollen, chalk, and mildew create a barrier between your paint and the surface. No paint—no matter how expensive—can bond to a dirty wall. Pressure washing before painting exterior surfaces is non-negotiable.
Pressure washing guidelines:
- Use 1,500–3,000 PSI with a 40° or 60° fan tip
- Keep the nozzle 12–18 inches from the surface
- On wood siding, drop to the lower end (around 1,500 PSI) to avoid gouging fibers
- Work top to bottom, rinsing in the direction of the grain
- Add an exterior detergent for heavily soiled or chalky areas
Mildew removal before painting house surfaces deserves special attention. Mix a solution of one part household bleach to three parts water, or use a dedicated mildew cleaner. Scrub affected areas with a stiff-bristle brush, let the solution dwell for 10–15 minutes, then rinse thoroughly.
Pro Tip: Test a small hidden area first. Bleach can lighten stained wood or damage certain types of siding. Wear gloves, eye protection, and old clothes.
After washing, allow a minimum of 24 to 48 hours of dry time before any further prep or painting. Painting over damp wood traps moisture, leading to blistering and peeling within weeks.
This step is foundational to preparing siding for paint, whether you’re working with wood, fiber cement, stucco, or vinyl.
Step 3: Scraping, Sanding & Feathering Edges
Once the surface is clean and dry, it’s time to remove every bit of loose, flaking, or blistered paint. This is where scraping and sanding exterior paint becomes the backbone of your DIY exterior painting prep.
Tools you’ll need:
- A 5-in-1 painter’s tool or carbide scraper for large flakes
- A stiff wire brush for textured surfaces or tight corners
- 80-grit sandpaper for rough removal; 120-grit for smoothing
- A random-orbit or belt sander for large, flat areas (wear hearing protection)
Feathering explained: After scraping away loose paint, you’ll have a visible “ledge” where the old paint meets bare surface. Feathering means sanding that edge at a gradual angle until the transition is smooth and invisible to the touch. Run your fingertips across it—if you feel a ridge, keep sanding.
Pro Tip: Always sand in the direction of the wood grain on siding. Cross-grain sanding leaves scratches that telegraph through your finish coat.
Critical safety note: If your home was built before 1978, test for lead paint before sanding or scraping. Home test kits are available at hardware stores. If lead is present, wear an N99 or N100 respirator, contain debris with plastic sheeting, and consider hiring a certified lead-abatement professional.
What happens if you skip this? New paint applied over loose flakes will pull away in sheets the first time moisture gets behind it. This is one of the most common exterior painting mistakes to avoid.
Step 4: Repairing Damage (Rotted Wood, Cracks, Holes)
With the surface clean and stripped, address every structural and cosmetic defect. Repairing rotted wood before painting is essential—paint cannot stop active decay.
Rotted wood:
- Small, localized rot: Scrape out soft material, apply a liquid wood hardener (epoxy consolidant), then fill with a two-part wood filler. Sand smooth once cured.
- Extensive rot (more than ~30% of the board is soft): Cut out and replace the damaged section. No filler will hold long-term.
Cracks and holes:
- Fill hairline cracks in wood or fiber cement with exterior-grade wood filler or elastomeric patch.
- For stucco, use a stucco patching compound matched to your texture.
- Masonry and brick cracks need a masonry-specific filler or hydraulic cement for larger gaps.
Allow all fillers and patches to cure fully per manufacturer instructions—often 2–24 hours—before sanding and priming.
This step is a major line item in any exterior painting prep timeline. Rush it, and your repairs will crack or shrink under the topcoat.
Step 5: Caulking Gaps & Seams
Caulking windows and trim before painting seals out moisture, blocks drafts, and gives your finish clean, continuous lines.
Where to caulk:
- Around window and door perimeters
- At trim-to-siding joints
- Where siding meets corner boards
- Small gaps between fiber cement planks
- Around fascia and soffit joints
Use a paintable, exterior-grade acrylic or silicone-acrylic hybrid caulk. Avoid interior-only caulk—it will crack and peel outdoors within a year.
Apply with a caulking gun in a steady bead, then smooth with a damp finger or caulk tool. Remove excess immediately.
Pro Tip: Don’t caulk the bottom edge of wood siding boards or the weep holes in brick. These allow trapped moisture to escape. Sealing them causes rot behind the paint.
Common mistakes include over-caulking (creating thick, unsightly ridges), skipping the cure time before painting (usually 1–4 hours), and using the wrong product outdoors.
Step 6: Priming Bare Wood & Repaired Areas
Priming bare wood exterior surfaces isn’t optional—it’s the adhesive bridge between your substrate and topcoat.
Why primer matters:
- Seals porous wood so paint doesn’t soak in unevenly
- Blocks tannin bleed (yellowish-brown stains that seep through paint from woods like cedar and redwood)
- Provides a uniform surface for consistent color and sheen
- Boosts adhesion on slick or previously painted areas
Choosing the right primer:
- Bare wood: Oil-based or shellac-based primer for maximum stain blocking, or a high-quality acrylic bonding primer
- Repaired/filled areas: Spot-prime with the same primer to ensure even absorption
- Metal flashing or hardware: Rust-inhibitive metal primer
- Stucco/masonry: Masonry-specific primer
Spot priming vs. full priming: If less than 20% of your surface is bare or repaired, spot priming is sufficient. If you’ve stripped large areas or are making a dramatic color change, a full prime coat saves you from uneven color and extra topcoats.
Follow the manufacturer’s recoat window—typically 2–24 hours. This is standard in professional exterior painting preparation steps and part of thorough exterior paint surface preparation.
Step 7: Protecting Landscaping, Windows & Non-Painted Surfaces
Protecting plants and landscaping when painting exterior surfaces saves you hours of cleanup and prevents costly damage.
- Drape canvas or plastic drop cloths over shrubs, flower beds, and grass within 6 feet of the work area
- Mask windows, glass doors, light fixtures, outlet covers, and door hardware with painter’s tape and plastic film
- Cover walkways, driveways, and patios with rosin paper or canvas (plastic alone becomes slippery when wet)
- Remove or cover mailbox numbers, house numbers, and decorative hardware
This step is quick but critical. Paint overspray on brick, stone, or mature landscaping is extremely difficult—and sometimes impossible—to remove. It’s a small investment of 30 minutes that protects thousands of dollars in hardscaping and plantings.
Step 8: Timing & Weather – When to Paint for Best Results
The best weather for exterior painting in most of the US falls within these parameters:
- Air temperature: 50°F to 85°F (and rising, not dropping)
- Surface temperature: below 90°F (hot surfaces cause paint to skin over and blister)
- Humidity: below 70%
- Wind: calm to light breeze
- Rain: none forecast for at least 24–48 hours after application
Avoid painting in direct, intense midday sun—the surface heats well past air temperature, causing premature drying and poor film formation. Windy days blow dust and debris into wet paint and accelerate uneven drying.
Regional considerations:
- Southeast: Paint in spring or fall to dodge summer humidity and afternoon storms
- Southwest: Early morning or late afternoon in summer; avoid peak heat
- Northeast/Midwest: Late spring through early fall; watch for overnight temps dropping below 50°F
Plan for 3 to 5 consecutive days of favorable weather. This gives you time to wash, dry, prep, prime, and apply topcoats without interruption. Check your local forecast twice before committing.
This planning is a key part of how to prep house for exterior painting successfully.
Common Exterior Painting Prep Mistakes to Avoid
Even experienced DIYers stumble on these exterior painting mistakes to avoid:
- Skipping the wash or painting before surfaces are fully dry
- Painting over loose or flaking paint instead of scraping it off
- Ignoring mildew—it will grow back through new paint within months
- Using interior caulk or the wrong primer outdoors
- Painting in direct hot sun, high humidity, or before rain
- Not protecting landscaping, leading to paint-stained plants and hardscape
- Rushing dry times between washing, priming, and topcoating
Each of these shortcuts might save an hour today but can cost you a full repaint in one to two years. Slow, thorough exterior painting tips for homeowners always beat speed.
DIY vs. Hiring a Pro: What Prep Tasks Should You Outsource?
Not every step suits every skill level or budget.
DIY-friendly tasks:
- Pressure washing and mildew treatment
- Light scraping and sanding on accessible, ground-level areas
- Caulking and masking
- Protecting landscaping
Call a professional when:
- There’s extensive rot requiring carpentry repair
- Lead paint is present (pre-1978 homes)
- Your home is two or more stories (safety risk)
- Full stripping, sanding, or multi-coat priming is needed
Cost context: Prep typically accounts for 50–70% of total project time. The cost of exterior painting prep is built into professional quotes, and it’s where you’re truly paying for expertise. A pro who spends two days prepping and one day painting will outlast a crew that rushes prep and sprays in an afternoon.
Understanding professional exterior painting preparation steps also helps you evaluate quotes and ensure no corners are cut.
Quick Exterior Painting Prep Checklist
Screenshot or print this summary for your project:
- ☐ Inspect all four sides + trim for damage, rot, mildew, and chalk
- ☐ Pressure wash entire exterior; treat mildew with cleaner
- ☐ Allow 24–48 hours for surfaces to dry completely
- ☐ Scrape all loose, flaking, and blistered paint
- ☐ Sand edges smooth (feather); test for lead if pre-1978
- ☐ Repair rotted wood, fill cracks, patch holes; let cure
- ☐ Caulk gaps around windows, doors, trim, and siding joints
- ☐ Prime all bare wood, metal, and repaired areas
- ☐ Mask windows, fixtures, and hardware; cover landscaping
- ☐ Confirm 3–5 day dry weather window before painting
This exterior painting checklist covers the full scope of exterior house painting preparation from start to finish.
Conclusion: Invest in Prep, Not Just Paint
Here’s the bottom line: exterior painting prep is the hidden 70% that separates a paint job lasting a decade from one peeling by next summer. The paint you choose matters, but it can only perform as well as the surface beneath it allows.
Take your time. Walk the perimeter. Wash, scrape, sand, repair, caulk, prime, protect, and wait for the right weather. Or hire a professional who treats prep as the priority, not an afterthought.
A properly prepped exterior doesn’t just look beautiful on day one—it shields your home from moisture, sun, and decay for years to come. That’s not just curb appeal. That’s protecting the single biggest investment you own.
Now grab that checklist, check the forecast, and get started. Your future self (seven years from now, still admiring that flawless finish) will thank you.