Imagine this: it’s a beautiful Saturday morning, but instead of enjoying the weekend, you’re watching your daughter battle a relentless sneezing fit. Or maybe you’ve noticed a lingering musty odor wafting from your basement vents every time the AC kicks on, or you’ve been waking up with unexplained headaches that miraculously fade once you leave for work. These aren’t just annoying quirks of homeownership; they could be warning signs of a hidden health hazard right inside your walls.
Your home’s ventilation system is the respiratory system of your house, constantly circulating the air your family breathes. When those ducts and vents are dirty, every room becomes a delivery zone for pollutants. According to the Environmental Protection Agency (EPA), Americans spend approximately 90% of their time indoors, where the concentrations of some pollutants are often 2 to 5 times higher than typical outdoor concentrations. Understanding and prioritizing ventilation cleaning isn’t just about keeping your HVAC system running smoothly—it is a critical step in improving indoor air quality (IAQ) and protecting your family’s long-term health.
What “Ventilation Cleaning” Actually Covers
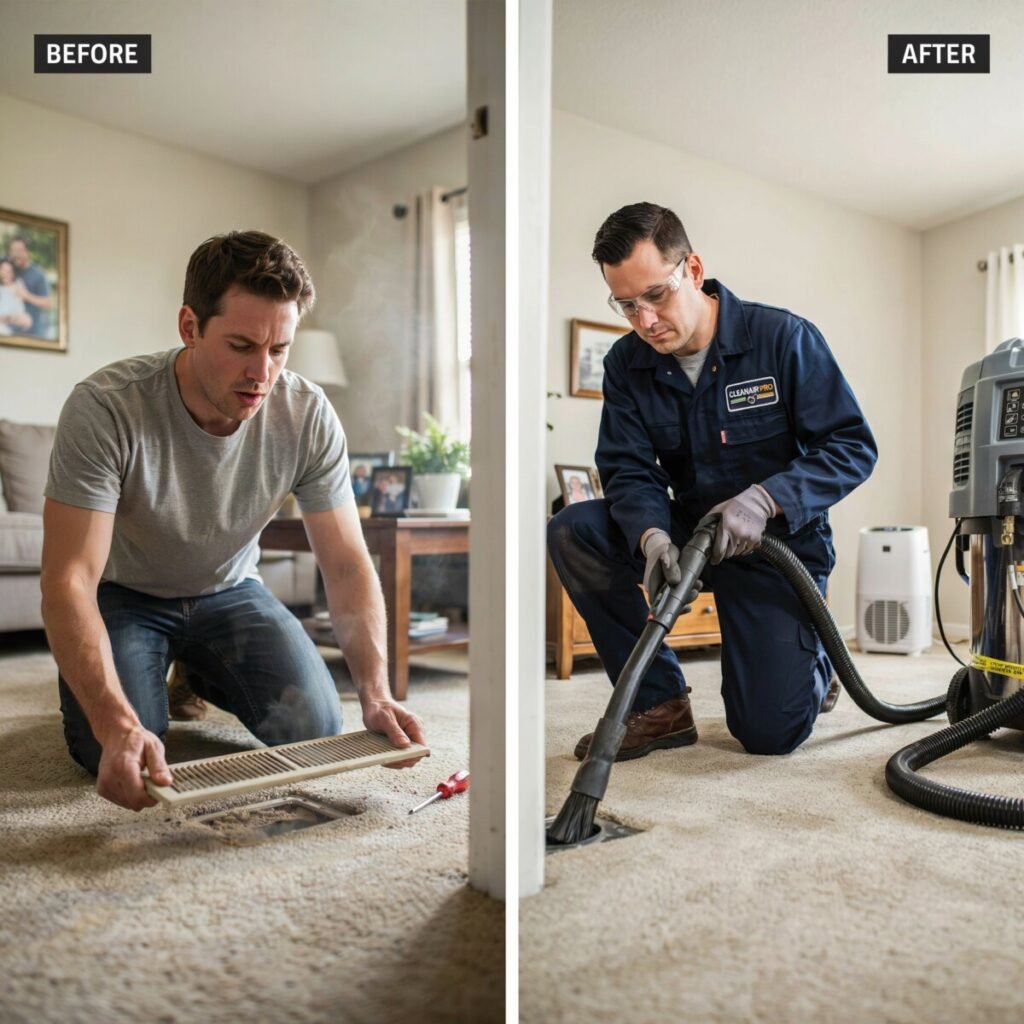
When professionals or DIY guides talk about ventilation cleaning, they are referring to a comprehensive sweep of the pathways that move air through your home. At its core, this includes HVAC vent cleaning—specifically the supply and return ducts that distribute conditioned air. But the scope goes far beyond just the main trunk lines. A thorough approach to ventilation system inspection and cleaning covers all accessible components: the visible vents and registers on your floors and ceilings, bathroom exhaust fans, kitchen range hood filters, and even the mechanical components of whole-house ventilation like Heat Recovery Ventilators (HRVs) or Energy Recovery Ventilators (ERVs).
However, it is equally important to understand what standard duct cleaning does not cover. Basic ventilation cleaning focuses on the physical removal of dust, debris, pet dander, and surface contaminants from the air pathways. It does not typically include full HVAC system sanitizing, chemical encapsulation, or comprehensive mold remediation. If a professional discovers active, widespread mold growth inside the ductwork or on the HVAC coils, or if there is asbestos insulation present, these issues require specialized environmental remediation experts. Similarly, while a technician can clear a disconnected or crushed duct, repairing or replacing severely damaged sheet metal or flex ducting falls under general HVAC repair rather than routine cleaning. Keeping these boundaries clear helps you set the right expectations and ensures you hire the right specialist for the job when severe contamination is found.
The Hidden Health Risks of Dirty Ventilation
Every time your heating or cooling system cycles on, it pulls air from your living spaces through the return vents, filters it, conditions it, and pushes it back out through the supply vents. If your ductwork is lined with years of accumulated grime, that system essentially becomes a high-speed delivery service for household pollutants. Over time, normal household activities—cooking, shedding skin cells, walking on carpets, and bringing in outdoor pollen—create a steady diet of dust, pet dander, and microscopic debris that settles deep inside your ducts.
The health risks of breathing this recirculated air are substantial. For allergy and asthma sufferers, dirty vents are a primary trigger. When the fan kicks on, accumulated pollen, dust mites, and pet dander are blasted into the air, leading to sneezing, watery eyes, and severe asthma flare-ups. But the risks extend beyond seasonal allergies. Damp areas in ductwork, particularly near AC evaporator coils or in humid climates, are prime breeding grounds for microbial growth and mold in ducts.
CDC Guidance on Mold: The Centers for Disease Control and Prevention (CDC) warns that exposure to damp and moldy environments can cause a variety of health effects, including nasal stuffiness, throat irritation, coughing or wheezing, and eye or skin irritation, with severe reactions possible in immunocompromised individuals.
Furthermore, household Volatile Organic Compounds (VOCs) from cleaning supplies, paint, and off-gassing furniture can become trapped in dusty filters and ducts, continually off-gassing into your home. This chemical exposure is frequently linked to chronic headaches, dizziness, and poor sleep quality. Even more concerning is the increased risk of respiratory infections; stagnant, dirty air can harbor bacteria and viruses, compromising your family’s immune defenses. By neglecting to remove pet dander from vents and clear out household dust, you are inadvertently turning your home’s central air into a continuous loop of respiratory irritation. Ultimately, the air you breathe indoors should be a sanctuary, not a source of chronic fatigue or illness.
Signs Your Ventilation Needs Cleaning
How do you know when to clean air ducts? While the National Air Duct Cleaners Association (NADCA) suggests cleaning on an “as-needed” basis rather than a strict calendar schedule, your home will usually provide clear warning signs. Walk through your house and look for these practical indicators:
- Visible debris: When you remove a vent grille, do you see heavy dust buildup, cobwebs, or dark, fuzzy spots that could indicate mold?
- Musty odors: Does a stale, mildew-like smell permeate the house every time the HVAC system runs?
- Allergy spikes: Are family members experiencing a lack of allergy relief at home, or do symptoms worsen the moment they step inside?
- Excessive dust: Are you finding yourself dusting furniture and vacuuming far more frequently than usual?
- Visible blockages: Is there heavy grease buildup in your range hood, or excessive lint visible in your bathroom exhaust fan or dryer vent?
- Uneven airflow: Do some rooms feel stuffy while others are drafty, or do you hear rattling noises coming from the vents?
Real-World Example: Take Sarah, a homeowner in Ohio, who assumed her chronic morning headaches were just from stress. It wasn’t until she had a professional ventilation system inspection that a technician found a massive, hidden rodent nest in her main return trunk. Once the debris was removed and the ducts were cleaned, her headaches vanished completely.
While dust and cobwebs can often be tackled with DIY vent cleaning, you must know when to suspect more serious issues and call a professional immediately. If you see visible mold growth on the hard surfaces of your ducts, notice signs of a rodent or insect infestation (like droppings or nesting materials blowing out of the registers), or smell a persistent burning or decaying odor, stop the system and hire a pro. These are not just cleaning issues; they are severe health and safety hazards.
DIY Cleaning: Safe Steps and Knowing Your Limits
For routine maintenance and surface-level grime, DIY vent cleaning is a highly effective, cost-saving project that any homeowner can tackle to reduce dust in home environments. Before you start, gather your tools: a heavy-duty vacuum with a hose and brush attachment, microfiber cloths, a screwdriver, warm soapy water, and a new HVAC filter.
Step-by-Step DIY Vent Cleaning
- Safety First: Turn off the power to your HVAC system at the thermostat and the breaker. Put on an N95 mask and gloves to protect yourself from inhaling stirred-up dust and allergens.
- Clean the Grilles: Use your screwdriver to carefully remove the vent covers and return air grilles. Wash them in the sink or bathtub with warm, soapy water. Rinse and let them dry completely.
- Vacuum the Ducts: While the covers are off, use your vacuum’s brush attachment to clean as far into the accessible ductwork as the hose will reach. Crucial tip: Do not use a broom or compressed air, as this will only push the debris deeper into the system.
- Tackle Exhaust Fans and Hoods: Pop off the covers of your bathroom exhaust fans and wipe down the fan blades. For range hood cleaning, remove the metal mesh filters and soak them in a degreasing solution (or run them through the dishwasher) to restore proper airflow and reduce fire risk.
- Replace the Filter: Install a new, high-quality air filter. Ensure it is facing the correct direction (arrows pointing toward the blower).
Knowing Your Limits
DIY is excellent for surface dust and grime, but it has strict boundaries. A household vacuum simply does not have the negative air pressure required to pull debris from deep inside the trunk lines. Furthermore, DIY is entirely insufficient for treating active mold, clearing heavy rodent nests, repairing disconnected flex ducts in the crawlspace, or performing deep HVAC coil cleaning. If your system has deep duct contamination, attempting to clean it yourself might just redistribute the pollutants. In those cases, professional duct cleaning is mandatory.
When to Hire a Professional
While DIY maintenance is great for the registers, there are specific scenarios where you must hire a professional for NADCA certified duct cleaning. If you have confirmed visible mold inside the ducts, a recent rodent or insect infestation, or your home has undergone major construction remodeling that flooded the system with drywall dust, it is time to call in the experts. Additionally, if you are suffering from persistent health symptoms even after DIY cleaning, or if your dryer vent has severe lint buildup (which is a massive fire risk requiring professional dryer vent cleaning), professional intervention is non-negotiable.
What should you expect when the pros arrive? A reputable service will begin with a thorough ventilation system inspection, often using cameras to show you the inside of your ducts. They will perform the cleaning using a truck-mounted or heavy-duty portable vacuum system that creates negative pressure, ensuring that dislodged dust and contaminants are pulled entirely out of your home rather than blown into your living spaces. NADCA-compliant cleaning includes agitating the debris with specialized brushes and air whips, and they should also clean the HVAC blower compartment and evaporator coils.
To choose a reputable pro, look for companies that hold NADCA (National Air Duct Cleaners Association) or NATE (North American Technician Excellence) certifications. Always read verified reviews, request a written scope of work and price upfront, and ensure they carry liability insurance. Avoid companies that offer suspiciously cheap “whole-house” blowout specials for under $100, as they often use high-pressure sales tactics to upsell unnecessary chemical treatments.
Costs, Frequency, and ROI
Understanding the professional duct cleaning cost helps you budget appropriately. In the US, a standard full-home air duct cleaning typically ranges from $400 to $1,000+, depending on your home’s square footage, the number of HVAC systems, and the level of contamination. Basic vent and register touch-ups or single-room cleanings will be cheaper, while targeted remediation for mold or extensive dryer vent cleaning may incur additional fees.
As for frequency, the general rule of thumb is to schedule a deep clean every 3 to 5 years for a typical home. However, you should shorten that interval to every 1 to 2 years if you have multiple shedding pets, indoor smokers, severe family allergies, or if you’ve recently completed a dusty home renovation.
The return on investment (ROI) extends far beyond just the initial price tag. Clean ducts mean improved energy efficiency HVAC performance, as your system doesn’t have to work as hard to push air through blockages. Homeowners also report significantly reduced dusting time, fewer allergy symptoms, an extended lifespan for their HVAC equipment, and, crucially, a drastically lower fire risk from properly maintained dryer and exhaust vents. The home ventilation health benefits easily outweigh the upfront cost of maintenance.
Preventive Habits and Maintenance Checklist
The best way to maintain good IAQ is to stop pollutants from entering the ventilation system in the first place. Adopting a solid ventilation maintenance checklist is key.
- Air filter replacement schedule: Check filters monthly and replace them every 60–90 days. Use a MERV 8 to MERV 13 filter to effectively trap pet dander and pollen without restricting airflow.
- Keep vents clear: Never block supply or return vents with furniture or rugs.
- Control humidity: Use dehumidifiers in damp basements and run bathroom exhaust fan cleaning protocols during showers to prevent mold in ducts.
- Routine cleaning: Vacuum and dust your home frequently using a HEPA-filter vacuum.
- Address leaks: Fix plumbing or roof leaks immediately to prevent moisture from entering the ductwork.
Try this simple seasonal schedule:
- Spring: Clean range hood filters and inspect all visible vent grilles.
- Summer: Check the AC condensate drain line and replace filters.
- Fall: Schedule professional dryer vent cleaning and prep the furnace.
- Winter: Monitor indoor humidity levels and ensure all vents are unobstructed by holiday decor or rugs.
Breathe Easier in Your Own Home
Ultimately, a clean ventilation system is the unsung hero of a healthy, comfortable home. By taking proactive steps to maintain your ducts and exhaust fans, you are directly investing in better sleep, allergy relief at home, and long-term respiratory health for your entire family.
Don’t wait for musty odors or sneezing fits to remind you that your home’s air needs attention. Download our free, printable Ventilation Cleaning Checklist below to track your seasonal DIY maintenance, or schedule a professional ventilation system inspection today. Contact a local NADCA-certified HVAC or duct-cleaning professional to request a free estimate, and take the first breath toward a cleaner, healthier home.