Are you tired of watching your energy bills climb every time the weather turns extreme? Or maybe you’re frustrated by walking from a sweltering upstairs bedroom into a freezing living room. Inconsistent home comfort and rising utility costs are common pain points for US homeowners and renters alike. Fortunately, upgrading your climate control is one of the most effective ways to take back control of your budget and your indoor environment.
When it comes to smart thermostat installation for savings, the benefits go far beyond just setting a daily schedule. A modern upgrade can learn your habits, adjust to your lifestyle, and shave a significant percentage off your monthly heating and cooling expenses. In this guide, we will walk you through exactly how these devices save you money, the basics of a DIY installation, typical costs and payback periods, and the warning signs that indicate it’s time to call a professional. Whether you are a seasoned DIYer or just starting to explore home energy management, you’ll find clear, actionable takeaways to make your home smarter and more efficient.
Quick Savings Summary
- Average Annual Savings: $100 to $150 (typically 8–12% on heating and cooling).
- Typical Installation Cost Range: $70 to $300 (DIY) or $150 to $300+ (Professional).
- Expected Payback Period: 1.5 to 3 years, depending on local energy rates and available utility rebates.
Why Smart Thermostat Installation for Savings Matters
Your HVAC system is likely the largest energy hog in your home, accounting for nearly half of a typical US household’s utility bill. How you control that system directly impacts your HVAC efficiency and overall energy savings. Older manual thermostats require you to remember to adjust the temperature every time you leave the house or go to sleep. If you forget, your system runs unnecessarily, wasting electricity and natural gas.
Upgrading to a programmable thermostat allows you to set automated schedules, ensuring your home is only heated or cooled when you need it. However, human error still plays a role; many people override these schedules or fail to program them correctly for changing seasons, negating the potential benefits. This is where a smart thermostat truly shines. By utilizing learning algorithms, geofencing (which tracks your smartphone’s location), and remote sensors, these devices automatically optimize your HVAC runtime. They can even participate in demand response programs, where your local utility company slightly adjusts your temperature during peak grid hours in exchange for bill credits.
When comparing your options, manual thermostats are cheap but inefficient. Programmable thermostats offer scheduling but lack adaptability. Smart thermostats provide the ultimate home energy management experience, adapting to your life rather than forcing you to adapt to them. By reducing unnecessary runtime and optimizing temperature setbacks, a smart upgrade pays for itself while keeping your home perfectly comfortable year-round.
Selecting the Right Thermostat for Your Home
Before you buy a Wi-Fi thermostat, you must ensure it is compatible with your specific heating and cooling setup. Most US homes use forced-air systems powered by a gas furnace, electric furnace, or heat pump. These typically operate on low-voltage (24V) wiring. However, if you have electric baseboard heaters or in-wall units, you likely have a line-voltage system (120V or 240V), which requires a specialized thermostat and poses a higher safety risk. Furthermore, homes with radiant floor heating or boiler systems often require specific thermostats equipped with floor sensors or high-voltage relays to prevent system damage. Always check your current system’s voltage and type before purchasing.
Power options are another critical factor. Most advanced smart home integration features require a constant power source, usually provided by a C-wire (common wire). If your current setup lacks a C-wire, don’t panic. Many modern devices include a C-wire adapter (also known as a power-extender kit) that plugs into a standard wall outlet and connects to your furnace control board. Alternatively, some basic models run on batteries, though this often limits advanced Wi-Fi capabilities and screen brightness.
When evaluating features, prioritize what matters most to your lifestyle. Do you want automated scheduling, geofencing to save energy when you leave, or learning algorithms that program themselves? If you have a multi-story home or rooms that are always too hot or cold, look for models that support remote room sensors. Other valuable features include detailed energy reports to track your usage, HVAC cycle detection to alert you if your system is running abnormally, and ENERGY STAR certification, which guarantees the device meets strict EPA efficiency guidelines and often qualifies you for a lucrative utility rebate. Finally, consider your wireless protocol: while most devices rely on standard Wi-Fi, some advanced home automation hubs utilize Zigbee or Z-Wave for local, low-latency control.
Step-by-Step Thermostat Installation Overview
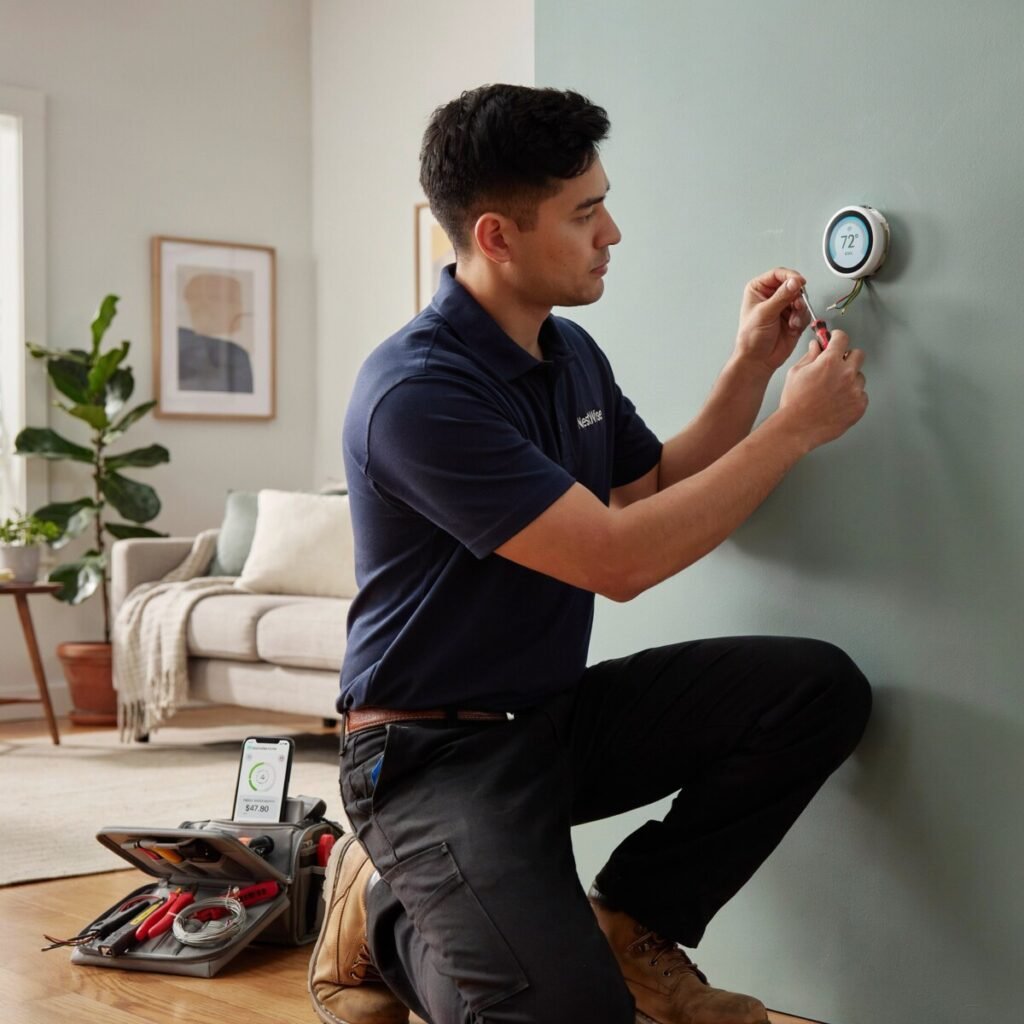
Learning how to install a smart thermostat is a manageable DIY project for many, provided you follow strict safety protocols and take your time.
Safety Warning: Always turn off the power to your HVAC system at the main circuit breaker before touching any wires. Treat every wire as if it is live until you have verified the power is off with a non-contact voltage tester.
1. Remove the Old Faceplate and Take Photos
Gently pull the old thermostat off the wall. Before disconnecting anything, use your smartphone to take clear, well-lit photos of the existing thermostat wiring from multiple angles. This is your ultimate backup plan if the included labeling stickers fail or fall off.
2. Label and Disconnect the Wires
Use the stickers provided with your new device to label each wire according to its terminal letter (not the wire color, as color conventions vary wildly between installers). Common terminals include:
- R (or RC/RH): Power (24V)
- W: Heating
- Y: Cooling
- G: Fan
- C: Common (Continuous Power)
Once labeled, disconnect the wires and carefully bend them outward so they don’t fall back into the wall hole. If a wire does fall, you may need to fish it out with a wire hanger.
3. Mount the New Baseplate
Use the included screws and drywall anchors to mount the new thermostat baseplate. Ensure it is level and that the wires pass cleanly through the center hole.
4. Connect the Wires
Match your labeled wires to the corresponding terminals on the new baseplate. Push the wire in until it clicks, and give it a gentle tug to ensure it is secure. If you are using a C-wire adapter, follow the manufacturer’s specific instructions for wiring it at the furnace control board. This usually involves plugging the adapter into a wall outlet near the furnace and connecting two low-voltage wires to the control board’s C and Rc/Rh terminals.
5. Attach the Faceplate and Restore Power
Snap the new smart thermostat display onto the baseplate. Head back to your breaker box and restore power to the HVAC system.
6. Setup and Testing
The screen should light up. Follow the on-screen prompts to connect to your Wi-Fi network and complete the thermostat setup. Once connected to the companion app, run a test cycle for both heating and cooling to ensure the system responds correctly and that the fan engages when prompted.
Troubleshooting Tips:
- No power? Double-check your breaker and ensure the C-wire is securely connected at both the thermostat and the furnace board. C-wire troubleshooting often involves checking for loose connections or blown 3-amp fuses on the furnace control board.
- HVAC not responding? Verify you placed the wires in the correct terminals based on your initial photos, not just the wire colors.
- Wi-Fi issues? Ensure your router is broadcasting on a 2.4GHz band, as many smart devices do not support 5GHz networks.
Costs, Rebates, and the Payback Period
Understanding the true thermostat cost requires looking beyond the retail price tag. A high-quality DIY smart thermostat typically ranges from $70 to $300, depending on the brand, display quality, and feature set. If you opt for professional installation, expect to pay an additional $100 to $300+ for labor, bringing the total installation cost to anywhere between $170 and $600 depending on the complexity of your wiring.
But how do these upfront costs translate to smart thermostat savings? The US Department of Energy estimates that properly managing your HVAC setbacks can save you up to 10% a year on heating and 15% on cooling. For an average US household spending $1,200 annually on heating and cooling, an 8% to 12% savings equates to roughly $100 to $144 back in your pocket every year.
Sample Savings & Payback Calculation
- Annual HVAC Energy Bill: $1,200 | Estimated Savings (10%): $120
- Hardware + Pro Installation Cost: $300 | Local Utility Rebate: -$50
- Net Initial Cost: $250 | Simple Payback Period: ~2.1 Years
To accelerate your payback period, always hunt for an energy rebate. Many local utility companies offer instant discounts at the register or mail-in rebates for installing an ENERGY STAR thermostat. You can find these incentives by checking your local utility’s website, browsing the ENERGY STAR rebate finder, or searching the Database of State Incentives for Renewables & Efficiency (DSIRE). In some cases, a generous utility rebate can cover half the cost of the device, reducing your payback period to less than a year.
Smart Home Benefits Beyond Savings
While energy efficiency is a massive draw, the true value of a smart home upgrade lies in convenience and comfort. With smart home integration, your climate control becomes part of a broader ecosystem. You can utilize voice control through Amazon Alexa, Google Assistant, or Apple Siri/HomeKit to adjust the temperature without lifting a finger. Imagine saying, “Hey Google, set the temperature to 72 degrees,” as you walk through the door with your hands full of groceries.
Home automation routines take this a step further. You can program your thermostat to automatically lower the heat when your smart lock engages at night, or raise the AC when your smart blinds close during the hottest part of the afternoon. For homes with uneven temperatures, adding remote room sensors allows for precise zone control, ensuring your bedroom is the exact temperature you want at bedtime, regardless of what the main hallway sensor reads.
Furthermore, participating in demand response programs through your utility provider can actually earn you bill credits. By allowing the utility to make minor, temporary adjustments to your AC during peak summer grid strain, you help prevent blackouts and get rewarded for it. Finally, remember to maintain basic digital hygiene: secure your Wi-Fi network with a strong password, enable two-factor authentication (2FA) on your thermostat app, and keep the device firmware updated to ensure your home automation setup remains secure against cyber threats.
When to Hire a Professional
While DIY is appealing, thermostat installation isn’t always a simple plug-and-play job. You should strongly consider hiring an HVAC technician or a licensed electrician if you encounter older homes with line-voltage wiring, complex multi-stage heating/cooling systems, dual-fuel setups (like a heat pump backed by a gas furnace), or whole-home zoned systems with multiple dampers.
Additionally, if you lack a C-wire and feel uncomfortable opening your furnace control panel to install an adapter, it is best to call a pro. Working inside a furnace involves high-voltage components that can be dangerous if mishandled. When looking for help, seek out NATE-certified HVAC techs who have proven their industry knowledge. Always read reviews, verify their licensing and insurance, and get multiple quotes to ensure a fair price for your installation cost.
Conclusion: Ready to Upgrade?
Upgrading your climate control is a smart investment that yields immediate comfort and long-term financial rewards. By combining the right device with proper thermostat installation, you unlock significant energy savings and seamless smart home readiness. Remember to carefully check your system’s compatibility, hunt for local utility rebates, and only attempt a DIY install if you feel completely confident working with low-voltage wiring.
If you are ready to tackle the project, preparation is key. [Click here to download our free, one-page Pre-Installation Wiring Checklist] to ensure you have the right tools and knowledge before you turn off the breaker. Not comfortable doing it yourself? Use our guide to find a trusted local professional to handle the job safely and efficiently!
The Ultimate Smart Thermostat Pre-Installation Checklist
- [ ] Kill the Power: Turn off HVAC power at the main circuit breaker.
- [ ] Verify: Ensure power is off by trying to turn on the fan/AC at the old thermostat.
- [ ] Document: Remove old faceplate and take 2-3 clear, well-lit photos of the wiring.
- [ ] Label: Label every wire using the provided stickers (match the letter terminal, NEVER just the wire color).
- [ ] Check for C-Wire: Identify if a Common wire is present. If missing, locate your power-extender kit.
- [ ] Secure Wires: Ensure wires are bent outward so they don’t fall into the wall cavity.
- [ ] Prep Tech: Have your smartphone ready, connected to Wi-Fi, with the thermostat app downloaded.
- [ ] Gather Tools: Keep a flathead screwdriver, Phillips screwdriver, drill, and a level nearby.